


This is the thirteenth lesson in the series Learning Sage X3. Is this lesson, I am going to cover how commissions work in Sage X3. To link specific products with specific reps, and, specific customers then Price books will be the best way to manage this.
Commissions in Sage X3 assigns commission at the time of a sales order based on sales rep to the line ordered. Hence, if no Sales rep is referenced, then no commission will be calculated.
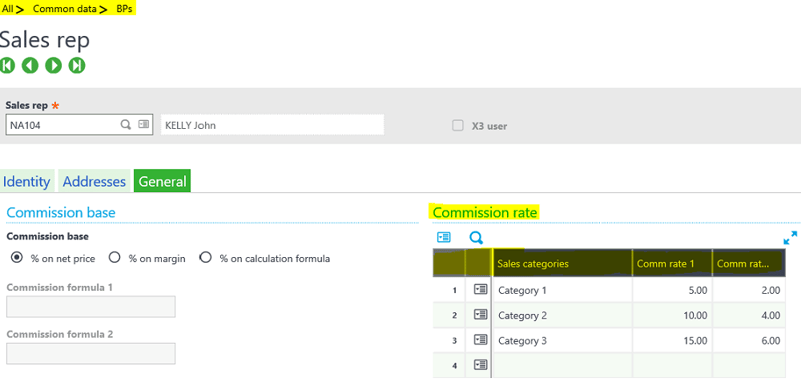
Set up a sales rep with the commission factors in Sage X3:
Go to: Common Data > BPs > Sales reps
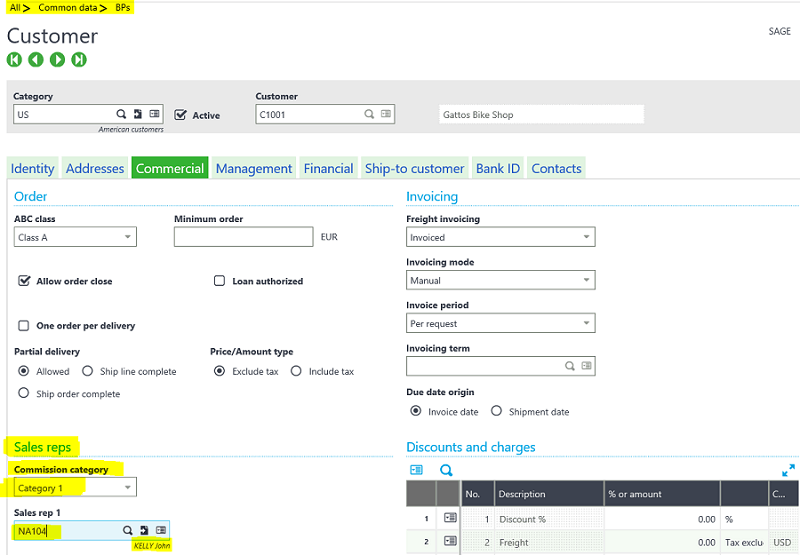
The customer must also have commission set up in Sage X3:
Go to: Common Data > BPs > Customers – Commercial tab
Please refer to the screenshot below. Here you can see John Kelly, Sales rep NA104, commission rate type category 1, is correctly set up to the Customer (Gattos Bike Shop).
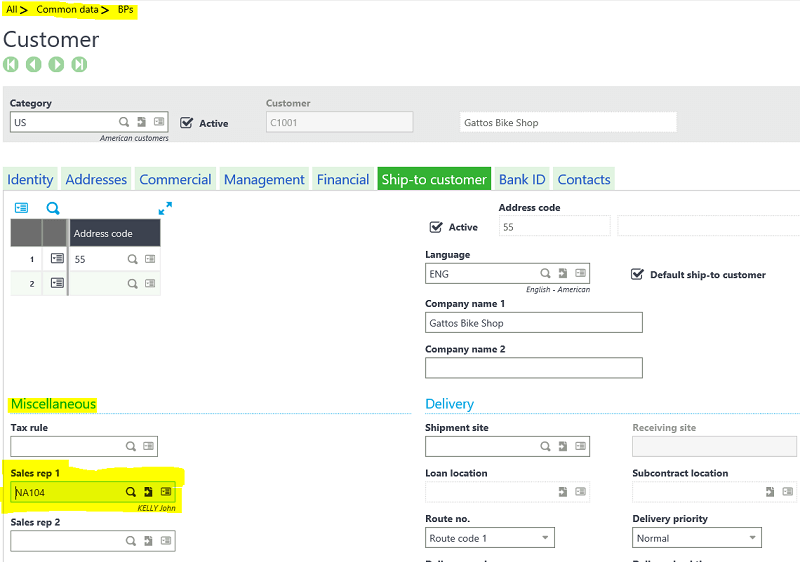
In addition, reference the sales rep on the ship-to customer address for the default to occur at the line during sales order entry.
Go to: Common Data > BPs > Customers – Ship-to customer tab
In the screenshot below, you can notice John Kelly, Sales rep NA104 is entered in as Sales rep 1 under Miscellaneous.
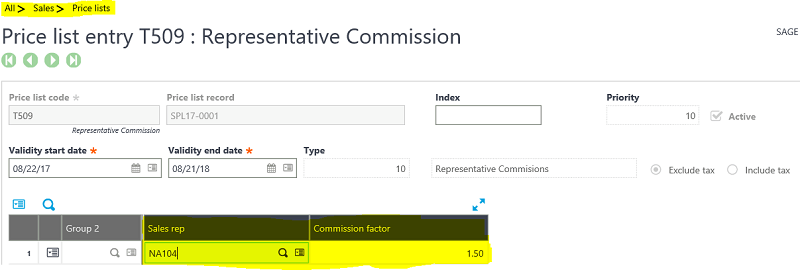
Optional Price book with the commission factor over-ride:
Go to: Sales > Price Lists Entry: T509 Representative Commission
Sales Order Entry
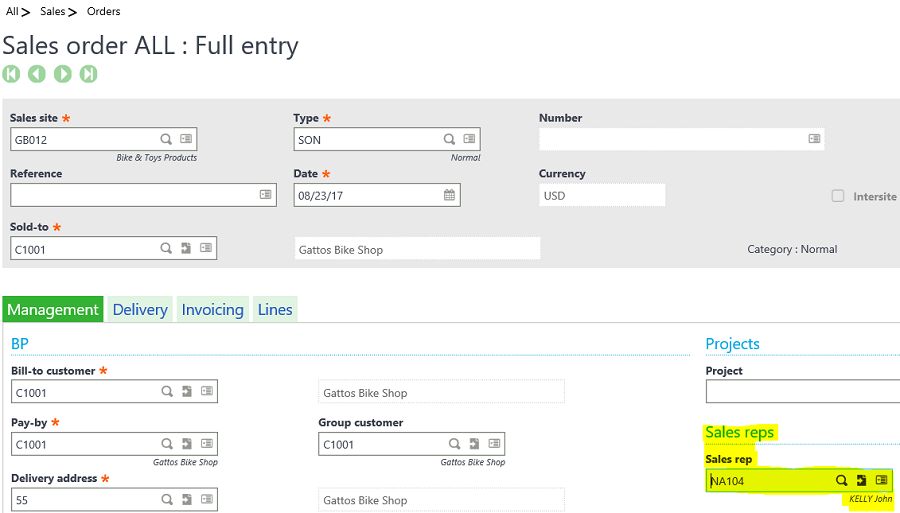
Notice John Kelly, NA104, sales rep is automatically assigned to the sales order. This is because the order is being sold to Gattos Bike Shop. I hope this blog post was helpful and provided a good starting point for commissions in Sage X3.
Stay Tuned for Lesson 14
This is the thirteenth post in Learning Sage X3. The next post (Lesson 14), How to Setup a Recurring Journal Entry in Sage X3, will post on December 12th, 2017. Other lessons in this series can be viewed at:
Lesson 1 of 14 - Important Acronyms and Definitions
Lesson 2 of 14 - General Navigation and User Interface
Lesson 3 of 14 - Sage X3 PU 11
Lesson 4 of 14 - Setting up Chart of Accounts
Lesson 5 of 14 - Sage CRM for X3
Lesson 6 of 14 - How to Add a Custom Report
Lesson 7 of 14 - How to Add a Column to a Left List in Sage X3
Lesson 8 of 14 - How to Export Data from Sage X3
Lesson 9 of 14 - How to Print a Report to Word and Excel
Lesson 10 of 14 - How to Configure a Field to be Mandatory
Lesson 11 of 14- How to Track Changes Made in Sage X3
Lesson 12 of 14- How to Configure Auto-number on Customers in Sage X3
Need Help with Learning Sage X3?
Contact us if you have more in-depth question or want to Learn Sage X3 or to request help with your system.