

Procedures for closing Sage 100 Payroll Period End
Sage 100 Payroll Period end occurs each quarter and at the end of the calendar year. We will walk you through the steps to close your 2017 Payroll and move into 2018. When the payroll period end processing is run, QTD and or YTD data is purged from the system and can only be recovered by restoring to a backup so it is imperative that a database backup is performed as well as a backup company created.
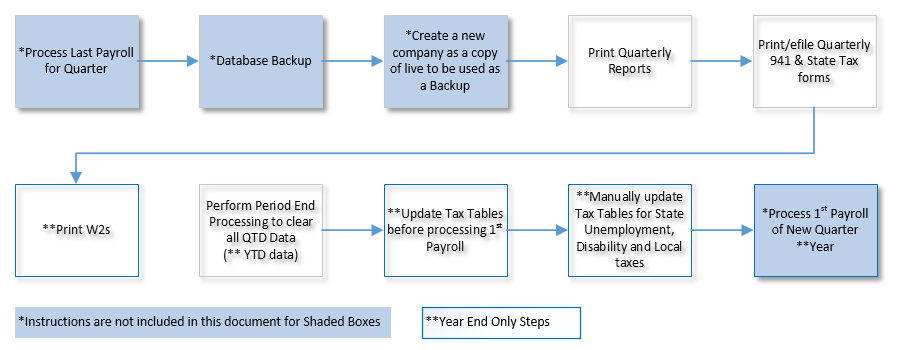
1. Print Quarterly Payroll Reports
This section covers reports you should run quarterly to save for your own records and to assist in reconciling the information on your tax forms. Sage recommends the following reports (at a minimum) be printed BEFORE period-end processing: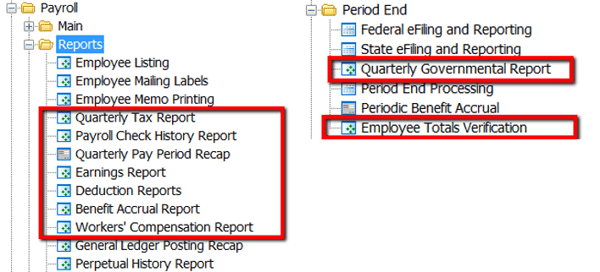
-
- Quarterly Tax Report (ID 26733): Produces a summary of each employee's wage and tax information for the current quarter and year for each tax jurisdiction. This report should be used to assist in reconciling your quarterly 941 form and applicable State quarterly tax forms.
- Quarterly Governmental Report (ID 49696): Used for reporting quarterly income and tax information to various governmental agencies. The default format supplied with your Payroll module accommodates the original federal Form 941A. This federal form is not required, but may be applicable for some state requirements.
- Employee Totals Verification (ID 26175): Used to confirm the calculated values of check totals for employees equal the employee totals in Tax Summary. This report lists employees with discrepancies, and employee totals that differ from check totals. Review this report before printing W-2 forms to verify the correct information is reported to the IRS.
- Payroll Check History report (ID 48774): Lists all checks written for a specified period by employee. Use this report for reference purposes. This report may not be appropriate for all reconciling purposes.
- Earnings Report: Provides a month-to-date, quarter-to-date and year-to-date summary of employee earnings information detailed by hours and amounts. This report is updated using the pay period ending date entered in Payroll Data Entry.
- Benefit Accrual Report: Provides a year-to-date summary of accrued benefit hours and amounts, by employee, for the three types of benefits (vacation, sick pay, and the third benefit type defined in Payroll Options). If the third benefit type is not defined in Payroll Options, the fields for this benefit type do not print.
- Deduction Reports (ID 49698): Provides a month-to-date, quarter-to-date, and year-to-date summary of employee deduction information for up to six deduction codes. This report is updated using the pay period ending date entered in Payroll Data Entry.
- Worker’s Compensation Report: Provides a recap of workers' compensation tax calculations. This report can be printed with employee detail or can be summarized by workers' compensation code. The number of paychecks, wages, and hours applying to specific codes are reported, as well as the tax extension for each employee. In the Workers' Compensation Maintenance window, when Monthly is selected in the Type of Limit field, the Workers' Compensation Report prints for the month defined in the Payroll Accounting Date field.
2. Print Quarterly Tax Forms
Print the 941 & 941 Schedule B Federal tax forms (ID 27107): This is a quarterly form. These forms are printed on plain paper.
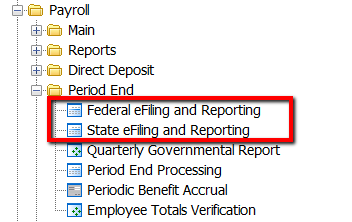
- Go to: Payroll > Period End > Federal eFiling and Reporting.
- Select the following, and click Accept.
-
- Form ID = xxxx 941/Schedule B/941-V Report (xxxx=tax form year)
- Verify Company information. *Note: Company name, address, phone and Federal Tax ID are automatically populated from Company Maintenance, but can be changed
- Verify the Reporting Year and Quarter
- Click Accept
Print applicable State tax forms (ID 52376): These forms are printed on plain paper.
- Go to: Payroll > Period End > Federal eFiling and Reporting.
- Select the applicable State from drop down
- Highlight applicable State tax form
-
- Verify Company information. *Note: Company name, address, phone and Federal Tax ID are automatically populated from Company Maintenance, but can be changed
- Verify the Reporting Year and Quarter
- Click Accept
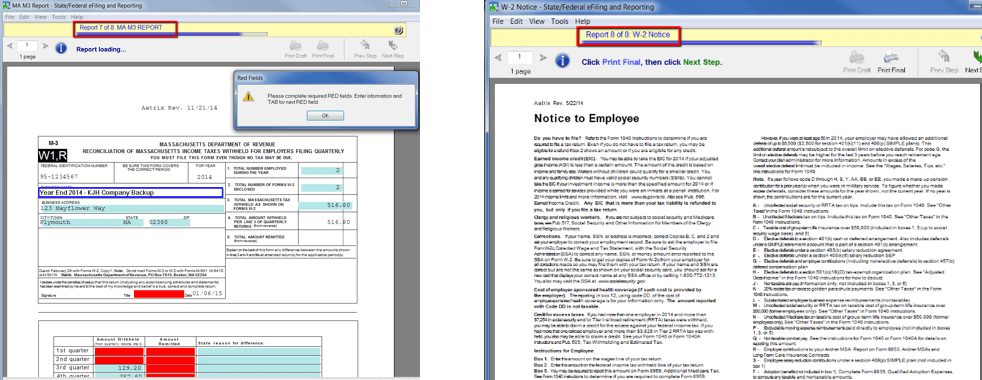
3. Print or eFile W2/W3 forms
W2's should be printed from your live company. They must be printed before year end processing is performed since all YTD data will be cleared. If a W2 needs to be reprinted after Year end processing, then it can be printed from your backup company.
a. Go to: Payroll > Period End > Federal eFiling and Reporting
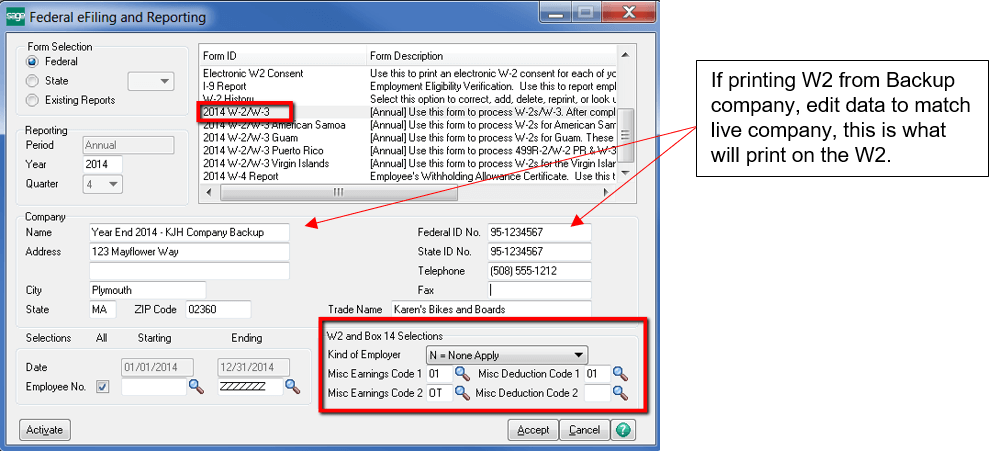
b. In the Form ID list, select xxxx W-2/W-3 (xxxx=Tax Year)
c. Complete the necessary fields, for example:
i. Company Name, address & phone *This information pulls from Company Maintenance but can be manually changed.
ii. Federal ID No.
iii. Trade Name
d. In the W2 and Box 14 Selections section
- Kind of Employer: Select the kind of employer for your business.
- Misc Earnings Code 1 and 2
- Enter up to two earnings codes for which to print year-to-date earnings information. The related earnings information will print in Box 14 on the W-2 forms for all selected employees. This field is available only if the W2/W3 form is selected in the Form list box.
- Note If you reprint W-2 forms at a later time, you must enter the same earnings code to print the same information on the forms.
- Note Before printing W-2 forms, ensure that the appropriate description appears in the Box 14 column in the State/Federal eFiling and Reporting W2/1099 Preparer window.
- Misc Deduction Code 1 and 2
- Enter up to two deduction codes for which to print year-to-date deduction information. The related deduction information will print in Box 14 on the W-2 forms for all selected employees. This field is available only if the W2/W3 form is selected in the Form list box.
- Note If you reprint W-2 forms at a later time, you must enter the same deduction code to print the same information on the forms
- Note Before printing W-2 forms, ensure that the appropriate description appears in the Box 14 column in the State/Federal eFiling and Reporting W2/1099 Preparer window.
e. Click Accept
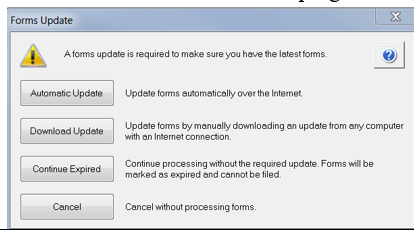
f. Follow the W-2 Wizard. Determine if you want to do a Test drive or Generate W2s and then Click Next. Walk through the wizard. Read each screen carefully and follow the instructions.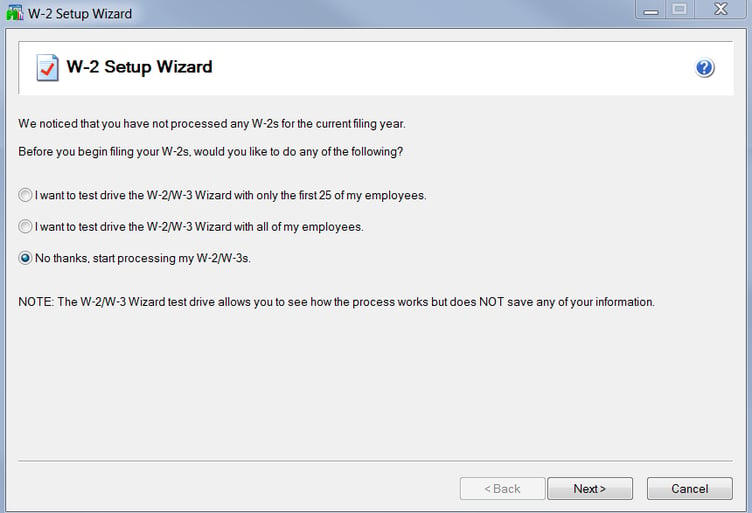
● Verify the State & Local tax items selections, and click Next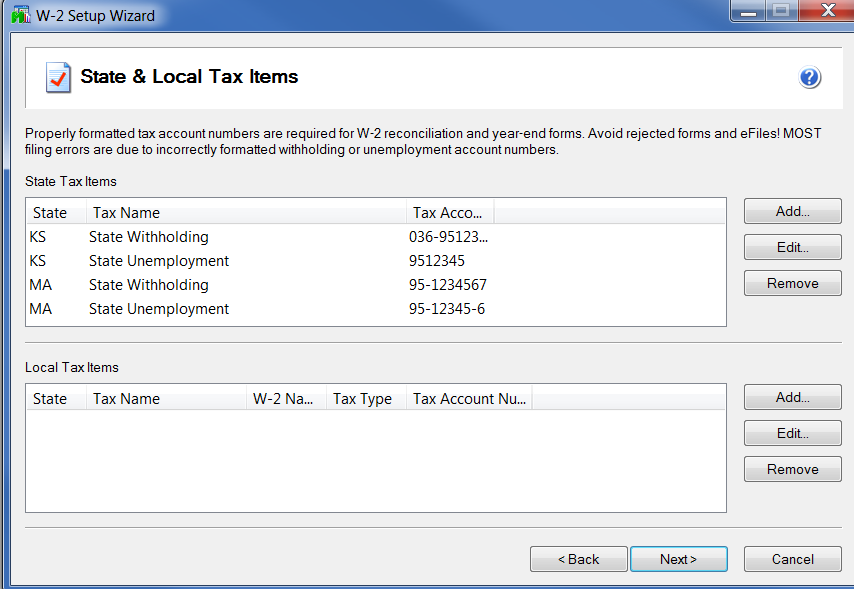
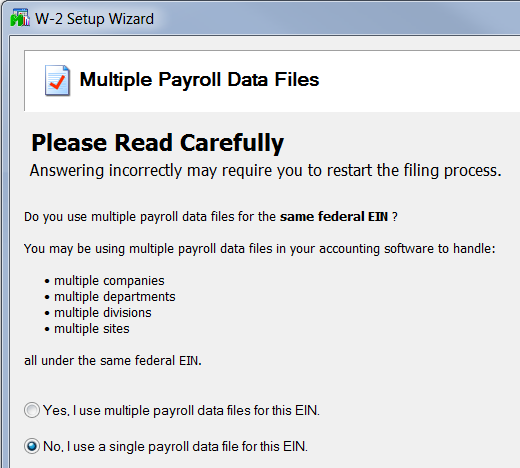
● In the Data Verification window, select Yes if any of the following exist:
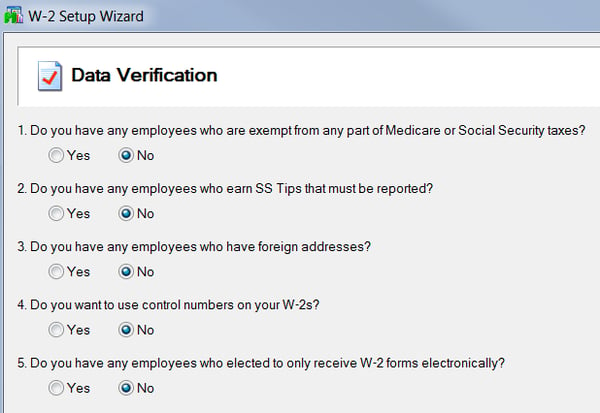
● To process W-2s for one company, click No when the message "Will you be filing forms using multiple payroll data files for the same federal EIN?" occurs. Note: This message only displays the first time W-2s are accessed
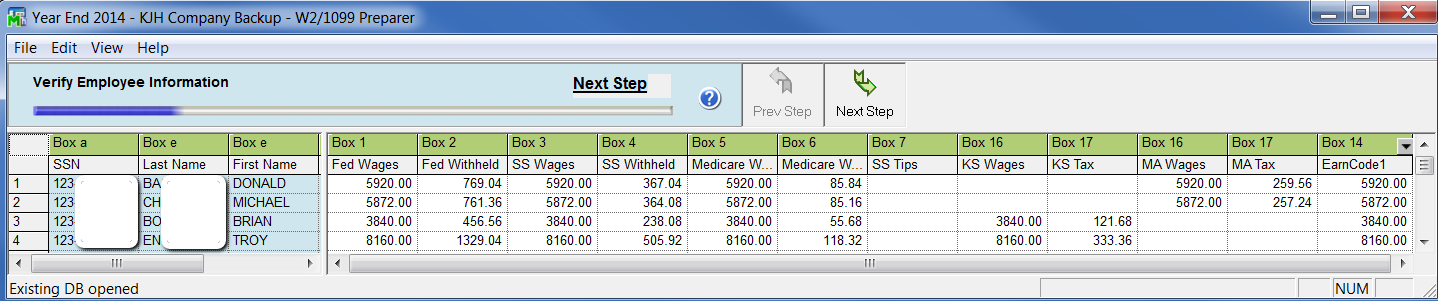
● Verify all Employee Data
g. The W2 Preparer screen is where you decide how you want to process your W2 forms (i.e. print, eFile or a combination of both). eFiling fees are paid directly to Aatrix or you can print the forms yourself to plain paper for no charge. If you print them yourself, you will need to order forms, see "Additional Resources" at end of this document for additional information on forms. There are two main options in the pricing and processing screen:
-
-
-
- Complete eFile Service
- Other Options

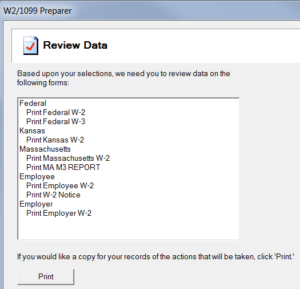
h. In the Review Data screen, validate forms that will be printed or eFiled based on your selections. When you hit next, each of these forms will display and can be printed or efiled.
Sample Forms that Print - Validate each form as it is printed/eFiled
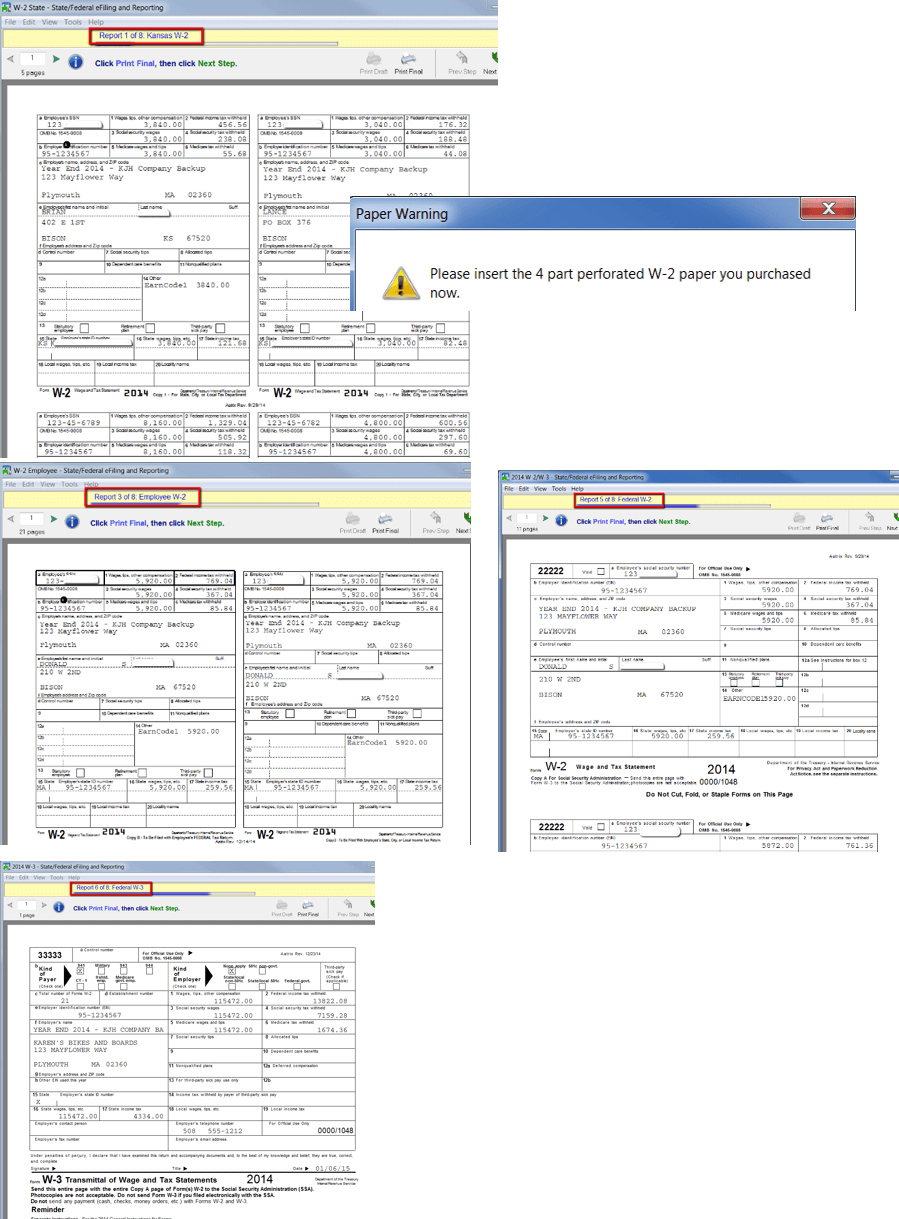
i. After all forms are printed, you have options to reprint as needed.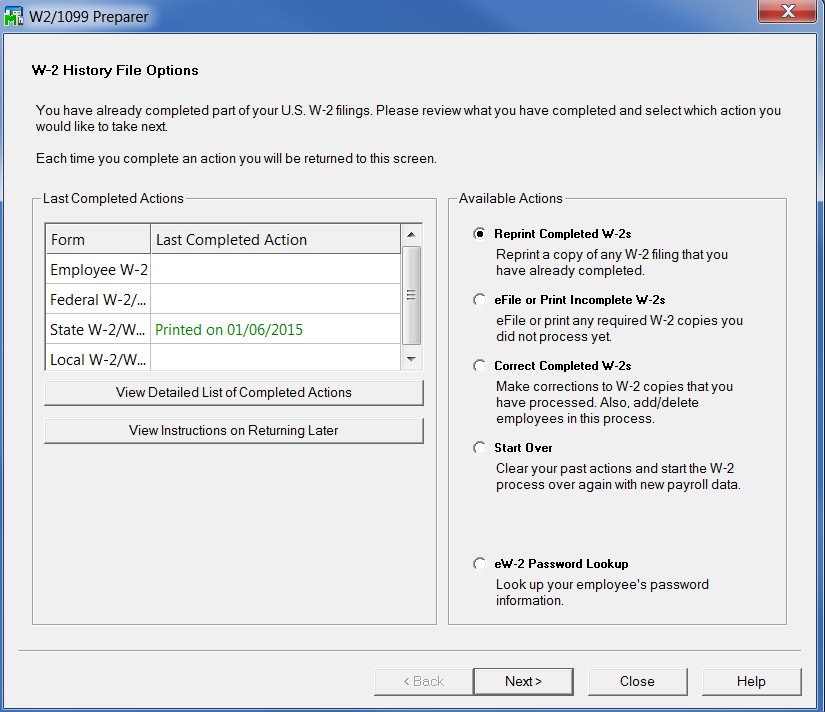
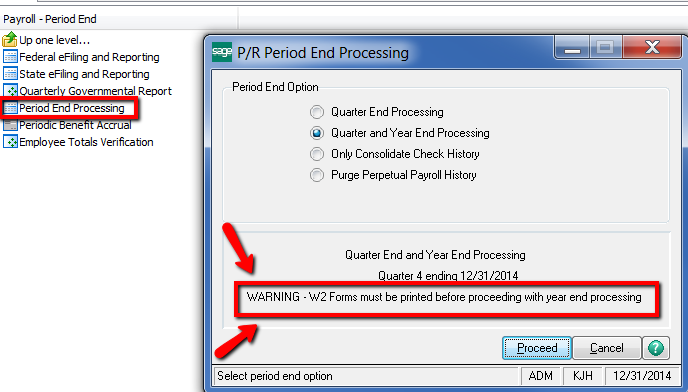
4. Perform Period End in Live company to close out 4th quarter
-
-
- Make sure all Quarter & Year End Reports have been printed
- Validate W2's have been printed/eFiled
- Validate a Backup Company of your Payroll has been created. (At a minimum create a copy of live company with Payroll, GL, and Common)
- Go to Payroll > Period End > Period End Processing
-
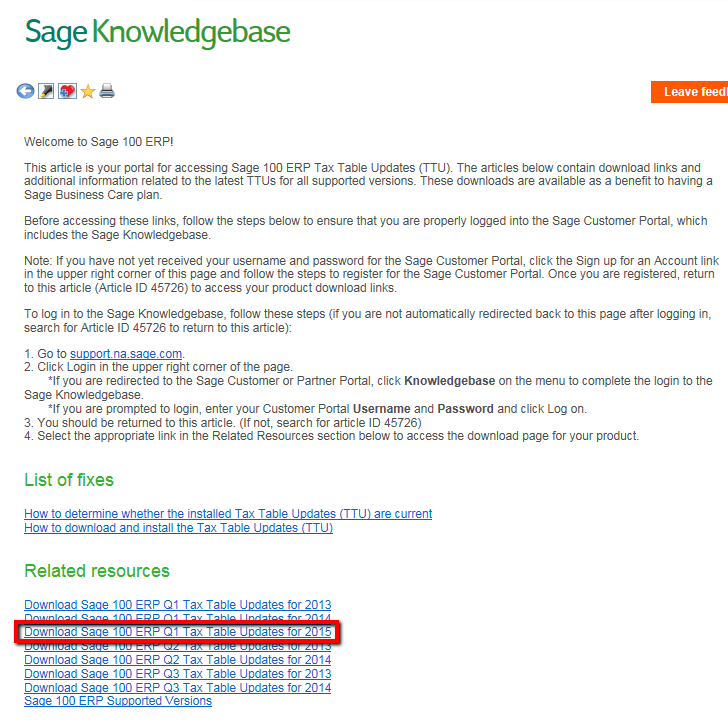
5. Update new Tax Tables before performing the 1st payroll of the new year.
a. Go to Sage Support and login or go to Sage City
Https://customers.sagenorthamerica.com
b. Go to Downloads
c. Select the Tax tables to be updated. *Check back at end of January since additional tax changes may become available. You should receive tax notifications as they become available throughout the year.
d. Follow the instructions for the Tax Table Update. They will walk you through downloading the executable file and a PDF that lists that tax changes. The executable file when launched will update the tax tables in the Sage 100 environment that you specify. Tax tables are global not company specific.
e. After the new tax tables are installed. Validate the installation by going to Library Master > Reports > Installed Modules Listing. This report will show the Tax update version.
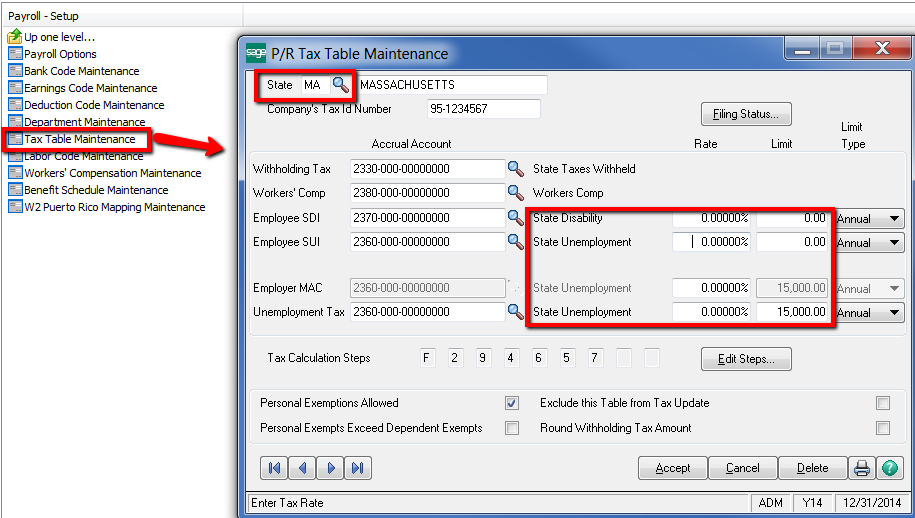
6. Verify and Change as necessary the State Unemployment, Disability and local Tax Rate and Limits in Tax Table Maintenance for each of the states you process payroll, to reflect correct 2015 rate for each company.
Download 2017 Sage 100 Payroll Year-end Processing Instructions
Download a printable pdf of the above instructions. Document includes additional references and helpful Sage links.
-
-