


It’s very important in today’s business world that you provide your customers with the highest quality products and services. Sage X3 has a standard feature that allows you to implement your quality control processes directly into your ERP system.
There are various setups on the product, product-site, technical sheets and stock management rules that define exactly when and how the quality control process will function within Sage X3.
Let’s take a look at an example of the Sage X3 Quality Control function integrated into the work order receipt process. This would emulate the business process of final inspection of produced goods in a manufacturing environment.
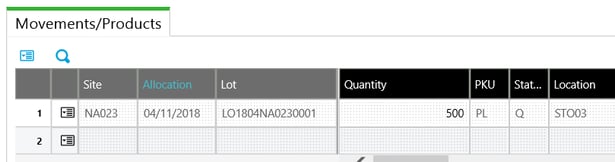
As the production tracking records are being processed, the product status code is being set to Q. Again, based on the stock management rules certain transactions cannot be performed with Q status products.
![]()
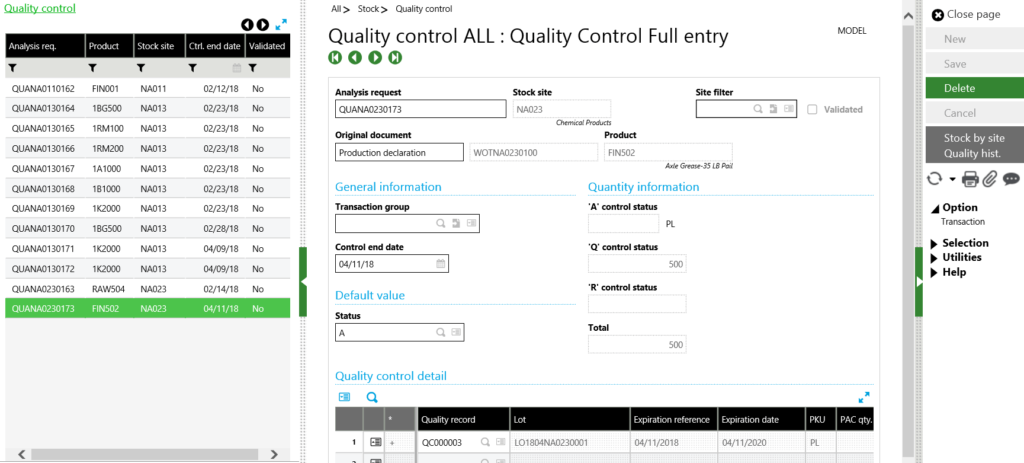
Once the production tracking receipt is finalized, a QC analysis requests is created in the Quality Control workbench.
The Quality Control Department can now complete the actual control steps defined in the technical sheet and post those results to the analysis request in the Quality Control workbench (Stock – Quality Control – Quality Control).
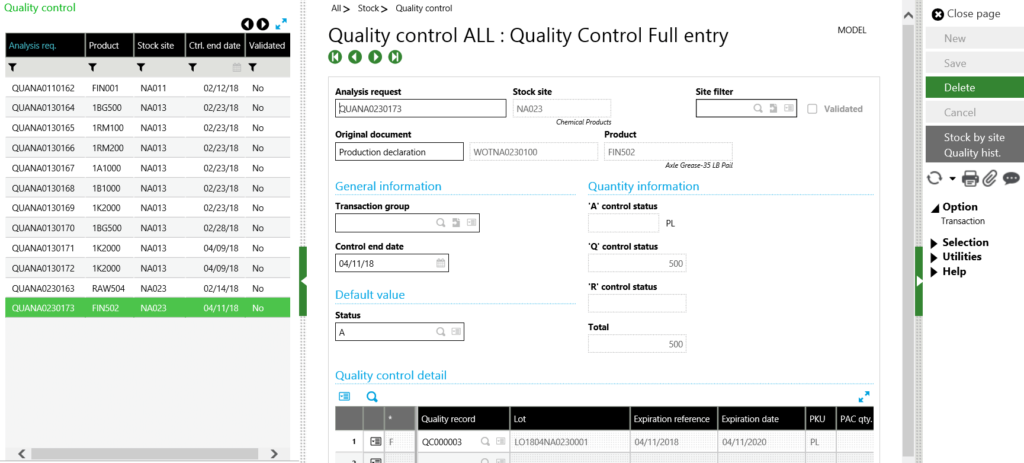
From the Quality Control workbench (pictured above) you can select the analysis request that was generated from the production tracking receipt from the left list. You will see various details regarding this analysis request including the original document generating the request, product and quantity detail, as well as the quality control detail grid at the bottom of the screen. Line items that have a technical sheet to be completed will be identified with an F in the * column of the detail grid.
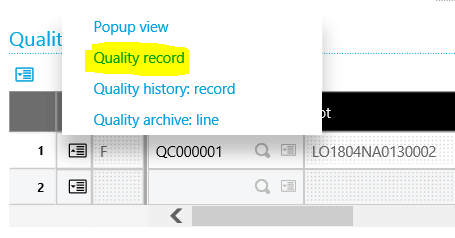
Clicking the action button on the detail line of the quality control grid and then click the Quality record options will give you access to the technical sheet.
The enter quality record screen will appear. The top section of the screen being the analysis request detail and the lower part of the screen being comprised of the questions and responses defined on the technical sheet.
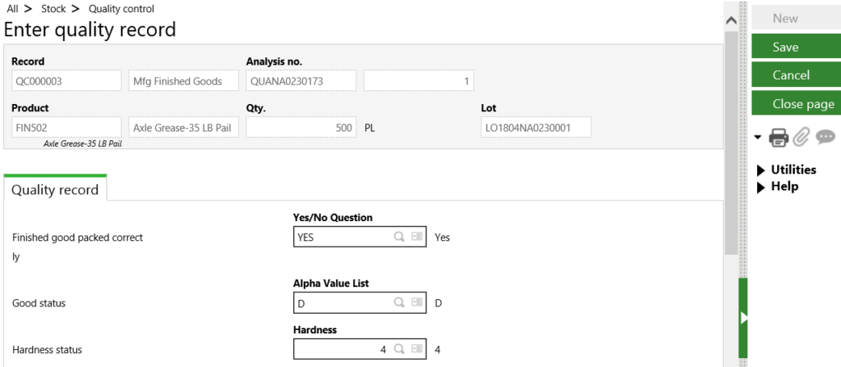
Once the responses are entered for each of the questions and the record is saved, you will see the analysis request detail line has been updated with a + in the * column.
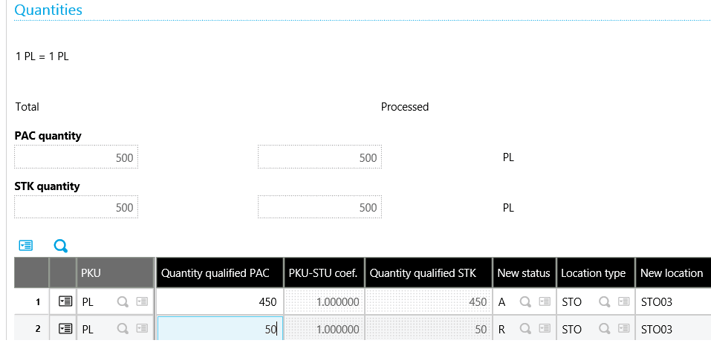
The Quality Control technician can now enter the respective quantities that have been accepted (A) or rejected (R) as part of the quality check by clicking the action button on the detail line of the quality control grid and then click the Enter quality control detail.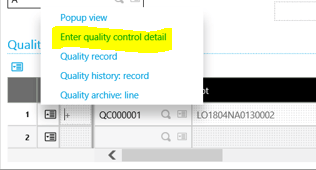
On the quantities grid of the enter quality control detail screen is where the accepted or rejected quantities are entered.
Once the detail quantity dispositions have been made and saved, the status of the analysis request is updated to a * in the * column.
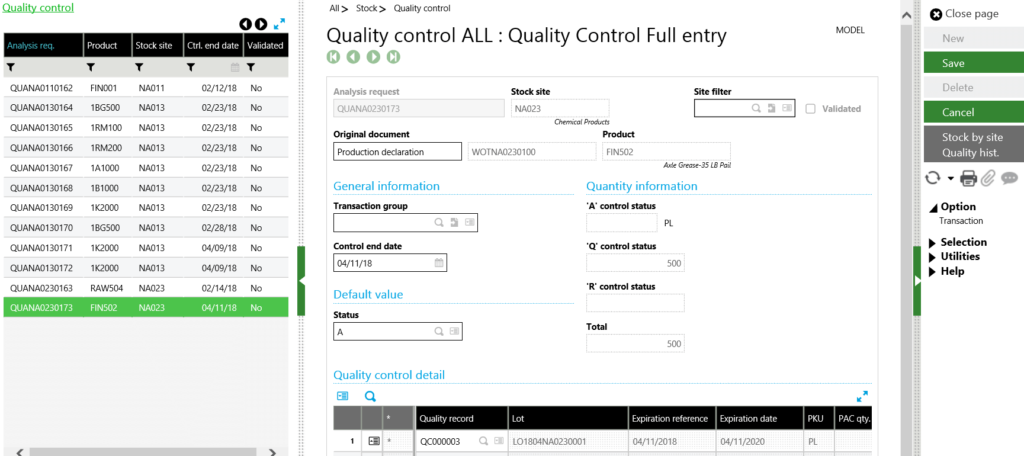
Clicking SAVE on the right list will complete the analysis request and process the inventory quantities into their respective statuses.
By implementing Sage X3 quality control processes directly into your ERP system, the test results and quality control data become part of an integrated system. This allows those test results and corresponding quality control data to be readily available for any reporting requirements as well as historical archiving should there be a quality control issue in the future.
Read the sister blog titled Quality Control on Purchase Order Receipts Process in X3
Have Questions or Need Help?

Click below to get in touch with us here at RKL eSolutions if you have questions about new features or need help with Sage X3.
Ask a Question

