

Visual Process Flows on your Sage X3 desktop allow for the graphical representation of a typical transaction cycle and easier navigation to the relevant functions and tasks in that cycle. It offers an easy and alternative way for you to navigate through the application (instead of relying on the extensive menus and lists of tasks). The steps for defining which Process Flows you want to add to the desktop portal are found mainly in the Interactive Dashboard menu under Setup and in the Authoring menu under Administration. Here’s how it’s done.
Overview: How to Create a Process Flow
The first step in the entire process is to Create the Process Flow using the Process Flow Editor, which can be found under the processes function. This is where you assign a code and name to your process flow.
Next, you’ll Define the Menu Item and link it to the Process Code that you defined under the Processes function.
Finally, once your process and menu item are defined, you’ll add your Process Flow to the Desktop Landing Page.
Step One: Define the Process Flow
To define a Process Flow in Sage X3, go to:
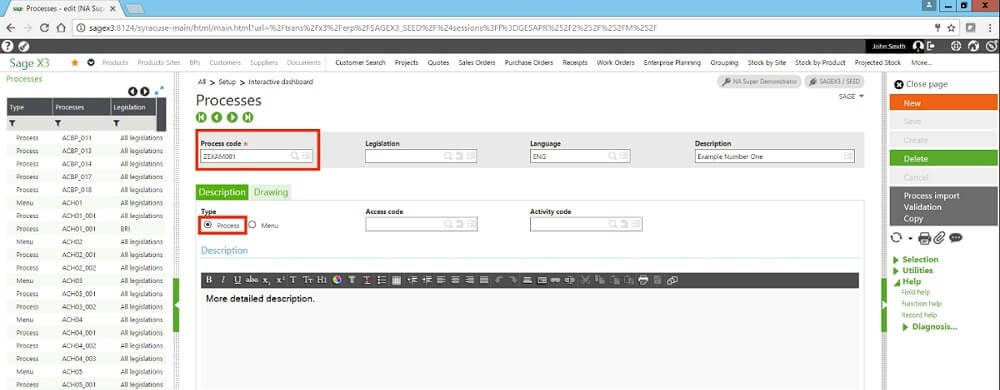
Setup > Interactive Dashboard > Processes function
Once your process is loaded, identify the Process Code. This is an important field to remember because you'll be using that process code throughout these steps.
Now you can assign a legislation and a language to your process code. Enter a description and check the box next to Process on the Description Tab. To assign security settings, enter the appropriate Access Code and Activity Code.
Note: if you wish to assign a more detailed description, you can do so under the Description section.
Now, the Process Flow is designed in the Drawing Tab. Using the Process Flow Editor, finish designing the process flow and fine tune its settings. After you’ve finished adding and linking your objects, make note of the Process Code that you’re using and create or save your entries.
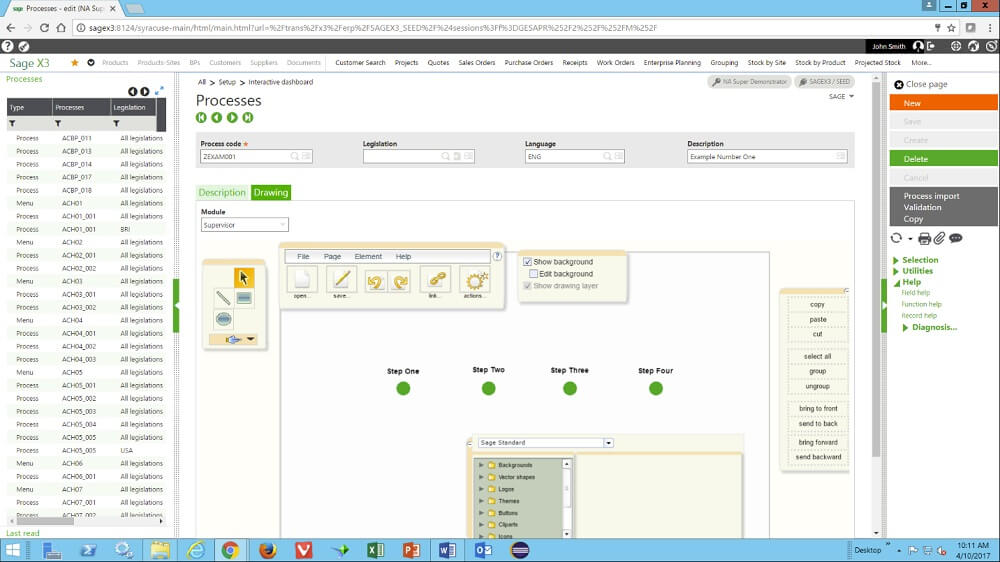
Step One Complete! This completes the first step; now you've successfully defined your process code and designed your Process Flow using the Process Flow Editor.
Step Two: Define the Menu Item
The next step is creating the menu item that will be available in your desktop portal.
Administration > Authoring > Menu Items
Click “Create menu item” in the right list and enter the code. It’s important to use the same code as your Process Code or a code that contains the Process Code for your menu item, as well as the same descriptions. This makes it easier to reconcile the two; you’ll know exactly what menu item relates to what Process Code.
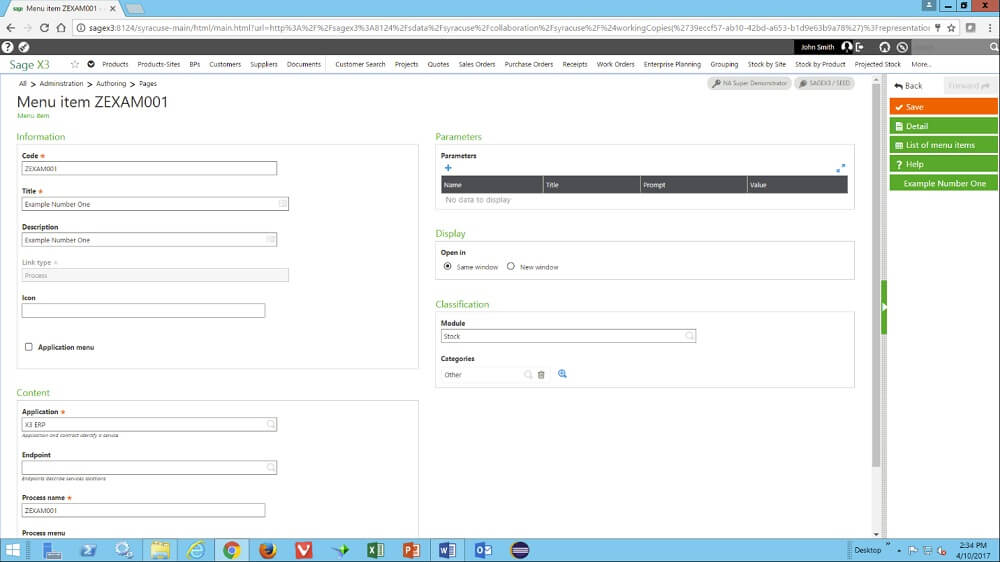
The Information section is where you define code, title, description, and link type values for your new menu item. Select “Process” in the link type dropdown. Be sure to verify that you have the correct link type and the application menu is unchecked.
The Content section is where you enter the Process Code defined in step one to process name for the menu item. Be sure to have the correct code since there is no lookup for this entry field.
The Classification section (optional) permits you to enter values for the module and category the process flow will appear in the selection dialogue box.
“Save” your entry before leaving the menu item creation or edit.
Quick Review: So let’s review the steps you’ve taken thus far. You’ve defined your Visual Process Flow by Process Code and created the menu item including the Process Code within the menu item. Now, complete the last step. Go to the Sage X3 desktop to finish adding the Visual Process Flow to your Sage X3 desktop.
Step Three: Add the Process Flow to the Sage X3 Desktop
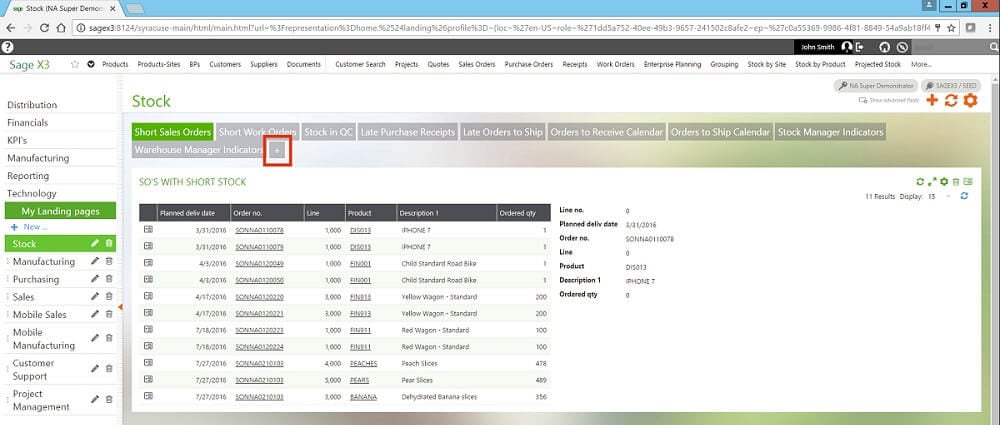
Add a new landing page or edit a landing page under the left list section “My landing pages.”
Click the “+” new tab icon within the landing page.
Select the Processes icon from the dialog box.
![]()
Select the desired Visual Process Flow from the modules, categories, and gadgets. Click the “Check mark” in the upper right corner and your visual process will appear on your Sage X3 Desktop landing page.

And that’s how you go about defining Visual Process Flows and adding them to your Sage X3 desktop.