Sage ERP X3 v7 was a major usability breakthrough and complete overhaul of the User Interface from previous versions. Sometimes when software versions take such giant leaps forward, the workflow or navigation may change with the new technology. In this specific instance, the process of adding document attachments in Sage ERP X3 v7 was affected.
Below, I’ve documented a step-by-step tutorial for adding a PDF to the Customer record that can be viewed by other users. This example applies to Sage ERP X3 Version 7 (Patch 8) and higher.
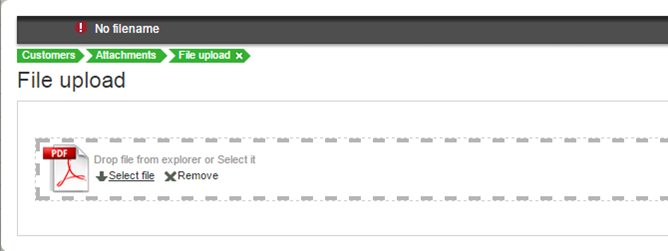
Hit [TAB] after selecting.
The PDF is now attached to the record. To verify the attachment and availability for others to access it:
Click the ‘Document Name’ lookup and select ‘View’.
There you go! With these documented steps, you’ll be adding document attachments to Customer, Vendor, Item, etc. records. Attaching source documentation to records eliminates paper and improves efficiency because users can access pertinent information without wasting time searching through file cabinets and folders.
If you need help with Sage ERP X3, our support team is here to help.