


This is the sixth lesson in the series Learning Sage X3. In this lesson we will cover 'How to Add a Custom Report in Sage X3.'
Usually clients do not use the AP Check format delivered with Sage ERP X3. For this example, it is a good practice to create a custom version of AP Checks. To do this, start with the base format and make a copy of it instead of starting from scratch.
- Go to Development -> Processes -> Reports
- Pull up and existing report code (e.g. NA-CHECKS)
- Add a “Z” in front of the report code to indicate it is a customer changed report
- Change the Crystal Report Name to reference ZNA-CHECKS

- Click on the Parameters tab and change any references to the old report name
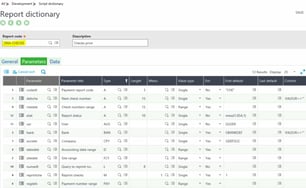
- Click the Create button to save the new report code
- Go to Set up > Destinations > Print Code
- Sort the list by Print Code and check through the list to see if the report you are copying exists.
- If the report exists, insert a new line in the grid referencing the new print code.
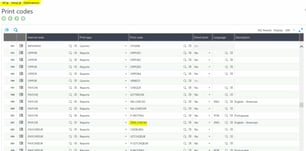
- Click Save to publish changes for the new report
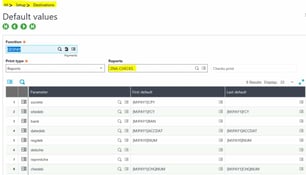
- Go to Setup > Destinations > Default Values
- In the left list, search for the function ‘GESPAY’ and select the report ‘NA-Checks’.
- Here you will find the default values and parameters for NA-Checks reports.
- On the right hand side of the page, select new to create a new ‘ZNA-Checks’ report. Here you will need to copy all of the information over from the NA-Checks default values (Parameters should look the same, just copy and paste first and last default information/values over individually).
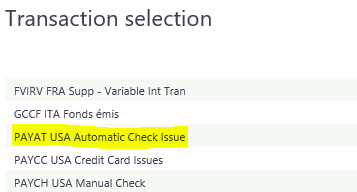
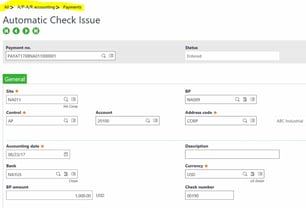
- Now to create a ZNA-Checks report. Navigate to A/P-A/R accounting > Payment / Receipt Entry – Select PAYAT USA Automatic Check Issue.
- This leads to the Automatic Check Issue screen. Please reference the screenshot below.
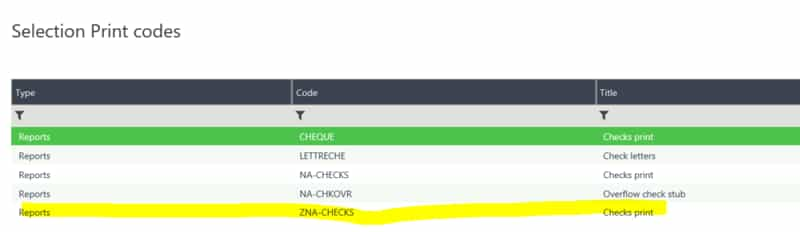
- On the right hand side of the page, please select the printer icon, and select the record button. After this you will be prompted to the Selection Print code screen below. Select the ZNA-CHECKS report option.
- This leads to the Report Parameters screen referenced below.
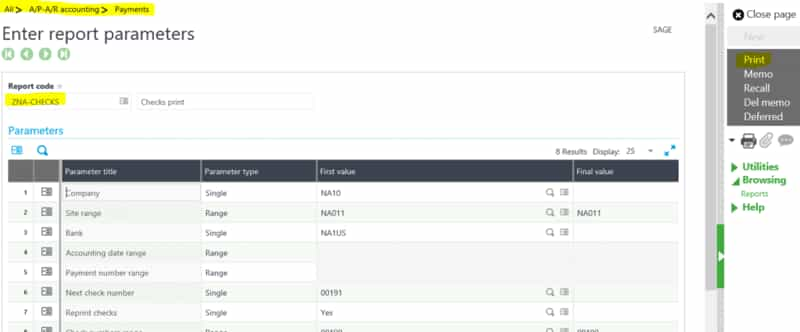
- Fill out the report destination details at the bottom of the screen. Now select ‘Print’ in the right side panel highlighted in the above screenshot.
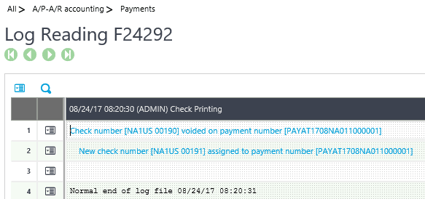
- If successful, it should begin printing and return the Log Reading screen below.
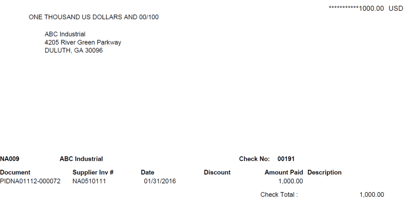
- Please find the custom ZNA-CHECKS report below!
Now you know how to add a custom report in Sage X3.
Stay Tuned for Lesson 7
This is the sixth post in Learning Sage X3. The next post (Lesson 7) will cover How to Add a Column to a Left List, to be posted on October 31, 2017. The first lesson in this series can be viewed at:
Lesson 1 of 14 - Important Acronyms and Definitions
Lesson 2 of 14 - General Navigation and User Interface
Lesson 3 of 14 - Sage X3 PU 11
Lesson 4 of 14 - Setting up Chart of Accounts
Lesson 5 of 14 - Sage CRM for X3
Need Help with Learning Sage X3?
Contact us if you have more in-depth question or want to Learn Sage X3 or to request help with your system.