

Sage 100’s autocomplete feature helps users quickly locate records while entering information in key fields such as General Ledger Account, Customer, Vendor, and Item. Sage 100 offers two types of autocomplete functionality: Basic Auto-Complete and Enhanced Auto-Complete. Understanding how these features work can help users search more efficiently and improve data entry workflows.
Basic Auto-Complete
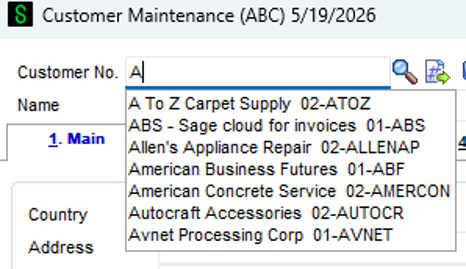
The basic Auto-Complete feature searches for records that begin with the text entered by the user, and shows a list of matching records. For example, if you access Customer Maintenance and type the letter A, you will see a list of customers that begin with A.
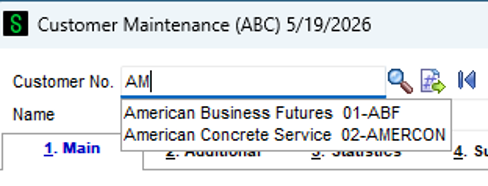
If you type AM, you will see the list of customers that start with AM.
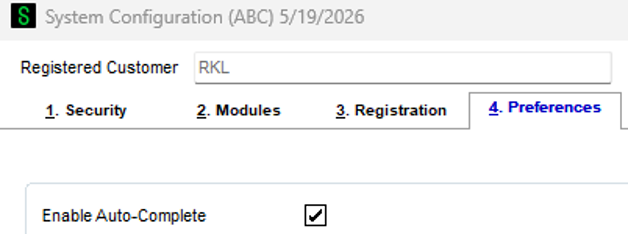
The basic version of auto-complete search is enabled by default, but you can disable it through Library Master, System Configuration, Preferences tab.
You can also disable or enable the auto-complete for each individual record type through Library Master, User Maintenance, Auto-Complete tab.
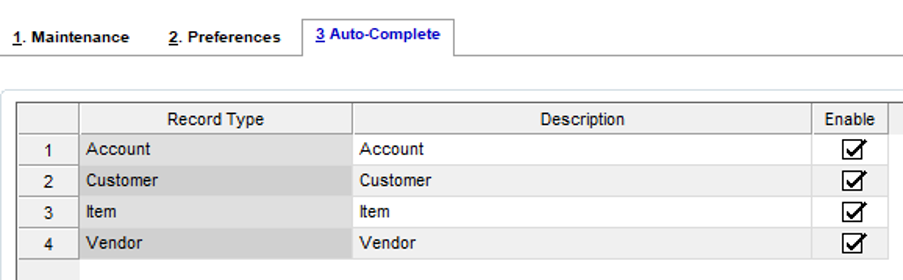
Enhanced auto-complete
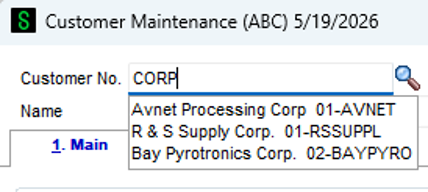
Enhanced Auto-Complete offers broader search results than the basic version. Instead of searching only for records that begin with the entered text, it compares the entry against any word in the indexed fields.
For example, if you type CORP, Sage 100 may display records where “Corp” appears anywhere in the customer, vendor, item, or account information, rather than only records that begin with “Corp." This can make it easier to find records when the user only knows part of the name or description.
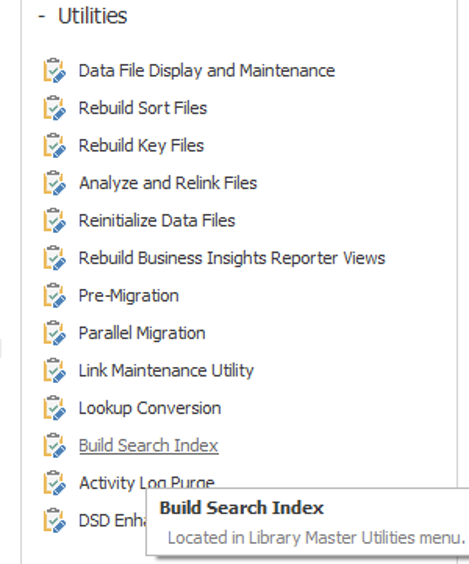
To enable the enhanced auto-complete feature, open Library Master, Utilities and run the Build Search Index.
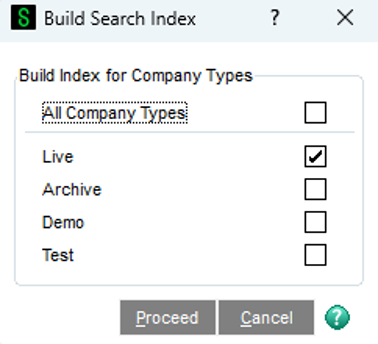
Once the task is launched you can specify which type of companies to enable enhanced auto-complete feature.
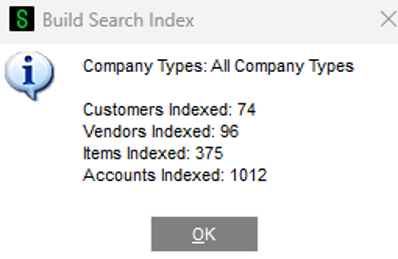
Once the utility completes, Sage 100 displays the rebuild results, including the number of customers, vendors, items, and accounts indexed. At that point, Enhanced Auto-Complete is enabled.
Reverting back to basic auto-complete
If Enhanced Auto-Complete has been enabled and the basic Auto-Complete functionality is preferred, the enhanced search index can be removed.
For Sage 100 2019 and higher
1. Browse to the ..\MAS90\MAS_SYSTEM directory on the server.
2. Rename or delete the Index_AC and Index_ACencrypt directories that were created.
3. The basic Auto-Complete will now be used.
For Sage 100 2018
1. Browse to the ..\MAS90\MAS_SYSTEM directory on the server.
2. Rename or delete the Index_AC directory that was created.
3. The basic Auto-Complete will now be used.
Looking for More on Sage 100?
For more helpful tips and tricks about Sage 100, subscribe to our blog and stay up-to-date with our latest tutorials. We're dedicated to providing valuable resources for businesses looking to optimize their financial management with Sage Intacct.
 Check out these blogs to help get you started!
What's New in Sage 100 Version 2026
How to Configure Sage 100 to Use OAuth Authentication
How to Distribute Reports Using Sage Intelligence for Sage 100 Users