I picked this to set up my next blog which is going to focus on Importing Data. These two topics are always highly requested tasks. People want to know how to get data out and get data into Sage ERP X3. The other thing that is not so obvious is where are these tasks located both in terms of how to run existing import/exports as well has creating new templates or customizing existing ones.
I picked the Products table because they want to do cleanup of things related to the Product master or they want to export it to provide it to their customers or vendors.
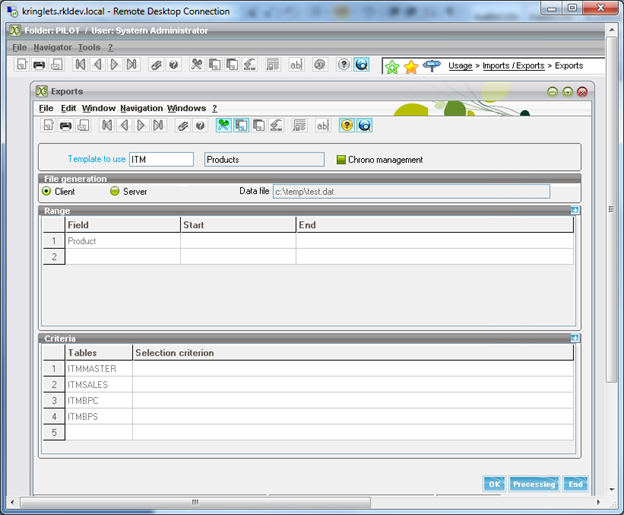
- Go to Usage -> Imports-Exports -> Exports
-
Choose a template (ITM for example)
- Uncheck the Chrono Management box.
- Choose whether to create the file on the server or the client. This selection will determine where the Data file path is located on the Sage ERP X3 Application Server or on the client that is running the Export.
- Click OK.
- Choose the location of the export file you are creating.
The above was simple running an existing Export Template. The creation of Import/Export templates and other related tasks is located under Parameters -> Usage -> Import/Exports. I am not going to go through all of the tasks or even the Window fields. You can find this information in the Help system.

One thing to remember if you create anything new or modify an existing Sage ERP X3 function to use the Activity Code field to help you identify your changes as well as prevent them from being overwritten by a future patch.