Part II: Building an Elasticsearch Test Environment
In this part and the next, we’ll explore a simple test set up of an Elastic stack, and use Node.js to interface with Sage X3. This is a surface-level skim, not a deep delve into intricacies you may encounter with a real world configuration. If you missed Part I you can access it here.
Setting up a test Elastic Stack
First things first. My development weapon of choice is usually a Mac, but here at RKL, we inhabit the Windows world. While Elasticsearch will work in either environment, the fastest means to stand up a proof-of-concept is a Linux environment.
You can jump through a lot of hoops and set up a standalone Ubuntu environment, which is always fun and exciting. But for our purposes here, a headless Vagrant virtual machine is a great opportunity to both test this concept and leverage it against it your regular development environment.
The Tools
Vagrant is “a tool for building complete development environments.” Started in 2010 by Mitchell Hashimoto, it significantly reduces the amount of time it takes to stand up a usable virtual. For this example, I’m going to use my Mac, as it’s already installed for my Ruby on Rails development environment.
A free virtualization product like Oracle’s VirtualBox is very useful, as most preexisting VagrantFiles are made for this. You can use other virtualization products like VMWare or Parallels, but the open source licensing of VirtualBox makes it great for low-expense testing.
After you’ve downloaded and installed both products, you’ll need to script out your Vagrant configuration. I’m using an established Ubuntu Server virtual machine that will be downloaded as part of this process.
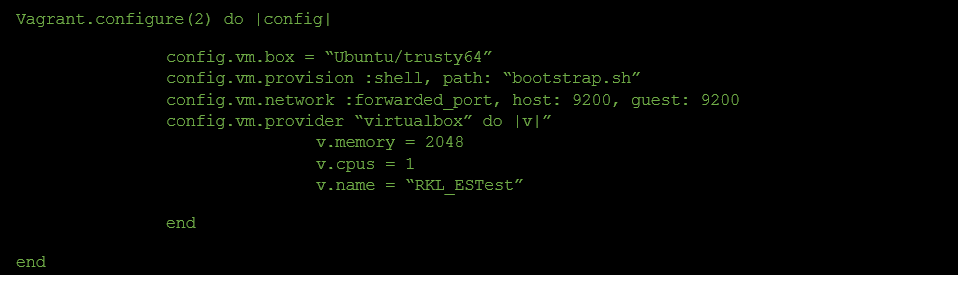 Vagrantfile
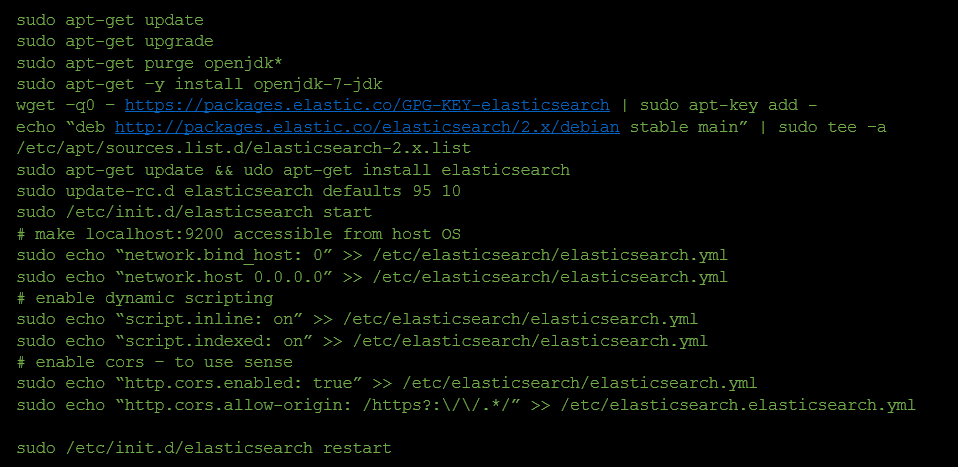 Bootstrap.sh
From this point, all you have to do is type vagrant up, and your VM will import or install, run all the configuration necessary.
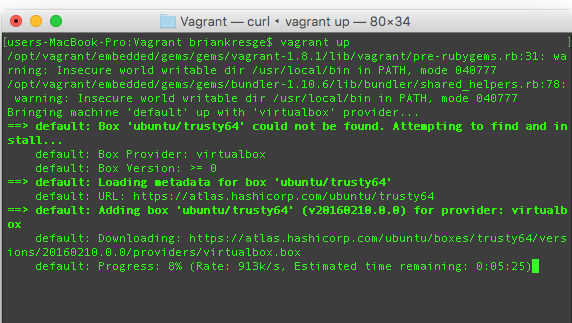 Vagrant up
Once it’s finished, you’ll see the vagrant message from your headless VM that Elasticsearch is running.
Vagrant message
This process, depending on your network bandwidth, can take less than 15 minutes. Once you’re here, you can ssh into your virtual via vagrant ssh. In the meantime, navigating to locahost:9200 gives us the preliminary love we’re looking for from our hasty test environment.
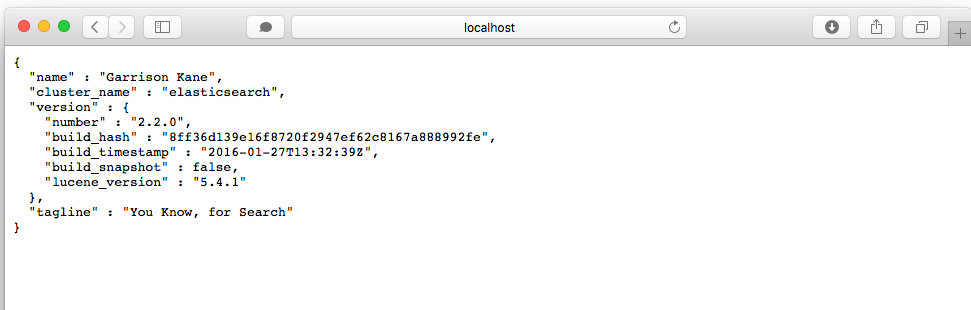 localhost
Querying and Testing with Sense
We’ll save a deeper dive into manipulating Elastic for the next part, but you noticed in our bootstrap.sh, we included a line or two to enable integration with Sense. It’s a wonderful Chrome extension that offers autocompletion, history, and help structuring your JSON interactions with Elasticsearch.
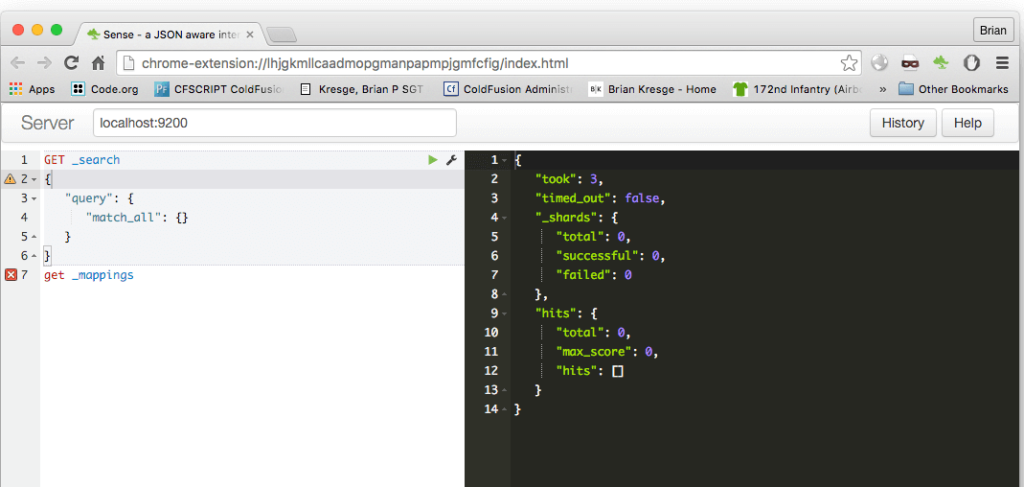 JSON interaction with Elasticsearch
Installing Kibana
I deliberately did not include this in our bootstrap.sh, because it’s optional. Kibana is a wonderful data visualization tool. When combined with Elasticsearch and Logstash (not covered in this series), it forms the “K” portion of the ELK triumvirate. The ease with which you can meaningfully view your data is unparalleled even with comparable commercial products.
First, let’s install Kibana with apt-get, using the following steps.
- SSH into your headless VM with vagrant ssh.
- wget –q0 – https://packages.elastic.co/GPG-KEY-elasticsearch | sudo apt-key add –
- echo “deb http://packages.elastic.co/kibana/4.4/debian stable main” | sudo tee –a /etc/apt/sources.list
- sudo apt-get upate && sudo apt-get install kibana
- sudo update-rc.d kibana defaults 95 10
- With Sense, create a .kibana index with dynamic mappings:
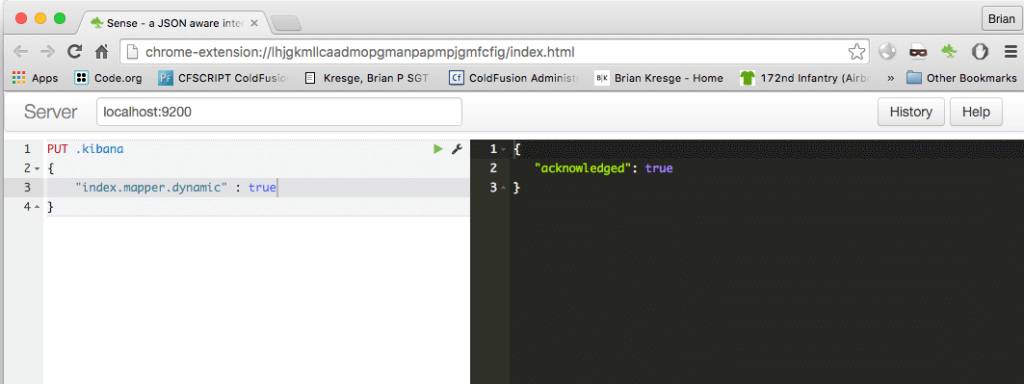 .kinbana index
7. e’ll also need to update our Vagrantfile to forward the Kibana port, 5601. Simply duplicate the 9200 forwarding line and add 5601.
8. Restart your Vagrant VM.
 Configure an kibana index pattern
Navigate to Kibana at localhost:5601, and you should be served the preliminary screens for this product.
In our third and final part, we’ll create our relevant mappings and indices in Elasticsearch, set up some visualizations in Kibana, and demonstrate how we can move data from our production systems to Elastic for manipulation and Machine Learning from Sage X3.