Sage X3 Version 12 added an enhancement which helps provide additional auditing information regarding the origin of a GL journal entry.
One of the most helpful enhancements that Sage X3 Version 12 has brought is the addition of a source transaction field in the GL Journal entry screen. With this feature, users can now easily determine which automatic journal was used during the creation of an entry. This is especially useful for entries that were automatically generated, as it can be difficult to track their origin without this information.
Use these steps to assist users with determining which automatic journal was used to create a GL entry that was automatically generated.
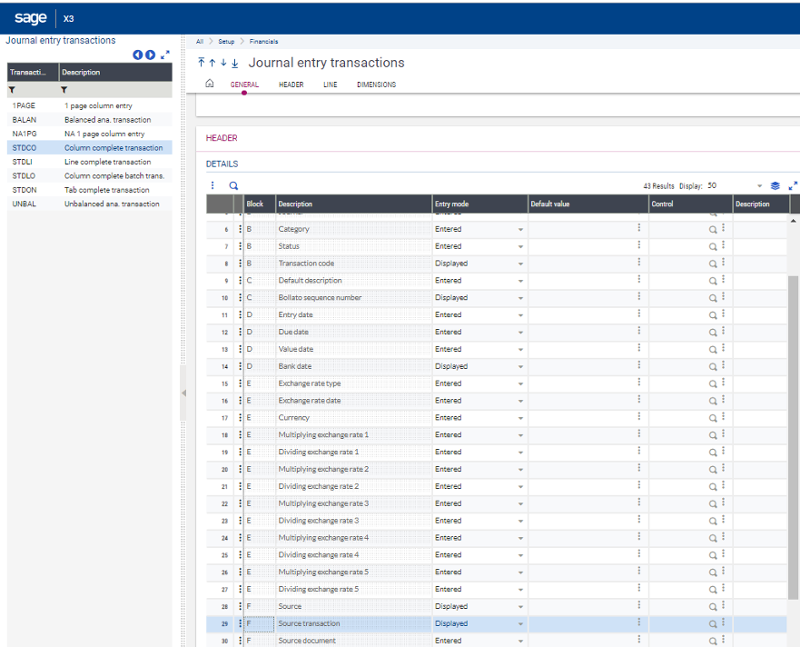
Add the 'Source Transaction' field to the Journal Entry Transaction screen
- Go to Setup > Financials > Journal Entry Transactions
- Select the Journal Entry transaction that is currently used.
- On the Header section make sure the ‘Source transaction’ field is set to “Displayed”.
- Save and validate the entry transaction.
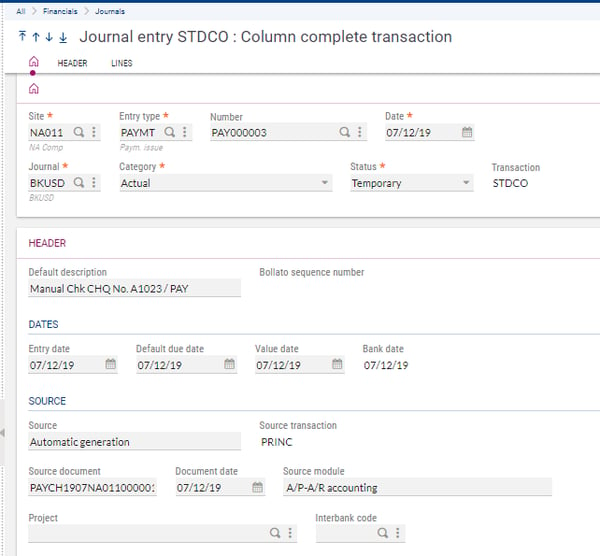
After adding the field to the entry transaction you can now see which automatic journal was used to create the automatically generated GL entries in Sage X3.
>>Want more Sage X3 tips?
Check out our other Sage X3 Blog Posts!
>>For more information about Sage X3 Enhancements, take a look at the blog below:
Updated UI Enhancements in Sage X3