Well I am sure if you have been following these that you are ready for me to finish. Let me assure you that I am happy to be coming to an end as well. I promise I will continue to add to my ramblings for the last 14 days in the future. I want to thank you for stopping by and I hope you enjoyed what I have shared. It was my pleasure to finally put down on paper what I have been compiling in my head.
The connection Settings for available folders on the login screen must be configured for each profile that logs into a workstation with the client software installed. We use this simple process to copy the connection settings across all profiles on a workstation by executing a windows batch file. Here are the steps involved:
- Log on to a workstation as a local administrator and launch the X3 client
-
Click the screwdriver icon to create new connection settings
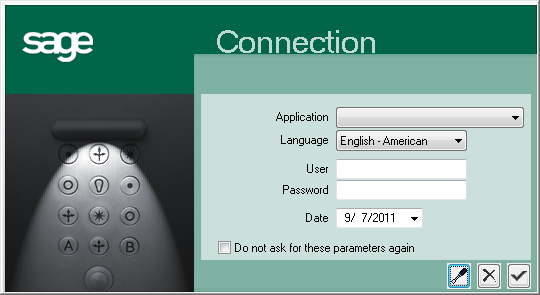
- Set up all the pertinent folders you wish to connect to
- Log into X3 via each connection to verify it is configured correctly
-
Navigate through Windows Explorer to the profile you are logged in as:
- C:Users[username]AppDataRoamingSageSafe X3 ClientV1
-
The contents of the AdxCnx.cfg file in this directory contain all the connection settings you just configured. Here is a sample file with 4 folders configured:
- X3#[sqlserver]#1806#########1#X3 (1806)#admin##DOMAINsagert#vqrgrQmsxuTrrw3uvatvauvaWdo#[sqlserver]#1#[sqlserver]#0#0#####BRY#1#X3V6##Sage ERP X3#V6.2#TRAINV6#[sqlserver]#1806#########1#TRAINV6 (1806)#admin##DOMAINsagert#vqrgrQmsxuTrrw3uvatvauvaWdo#[sqlserver]#1#[sqlserver]#0#0#####BRY#1#X3V6##Sage ERP X3#V6.2#PILOT#[sqlserver]#1806#########1#PILOT (1806)#admin#vmvvaTo2vccUm#DOMAINsagert#vqrgrQmsxuTrrw3uvatvauvaWdo#[sqlserver]#1#[sqlserver]#0#0#####BRY#1#X3V6##Sage ERP X3#V6.2#PROD#[sqlserver]#1806#########1#PROD (1806)#admin#ukrgrTevccTkrqweor#DOMAINsagert#vqrgrQmsxuTrrw3uvatvauvaWdo#[sqlserver]#1#[sqlserver]#0#0#####BRY#1#X3V6##Sage ERP X3 #V6.2#
- Copy the AdxCnx.cfg file to the X3 SQL server to a shared folder that is accessible to the X3 workstations
-
In the same shared folder, create a windows batch file with the following command. This will copy the AdxCnx.cfg file from the server to the computer the bat file is executed on, search through the existing profiles for the existing AdxCnx.cfg file, and replace it with the configured one from the server
- replace "[servername][sharename]AdxCnx.cfg" "C:Users" /S/P
- Log into an X3 workstation and navigate to the shared directory and execute the bat file you just created (as an administrator). This will execute the copy to each profile.
I want to thank Cliff Horst from our team for his assistance with this posting.
I will be offline for you few days spending time with my wife…talk to you when I get back!