Scenario:
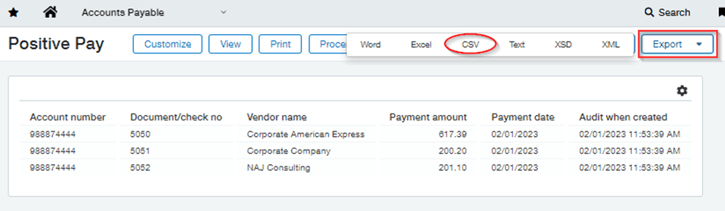
Setting up Positive Pay with the bank and need to generate a csv file that contains Bank account number, check number, Vendor name, payment date, and amount. File will be uploaded to the bank after each check run so that bank can verify each check that is cashed.
Note: This report may not be able to accommodate all positive pay bank requirements, validate requirements with your bank. Report cannot be auto-uploaded to the bank. RKL has an advanced Positive Pay module available for purchase if this will not meet your requirements.
End Result:
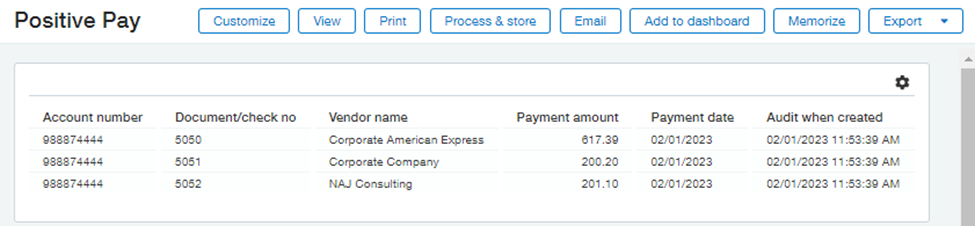
Report:
Export as a csv file

Steps to Create a Custom Report for Positive Pay
- Go to Platform Services > Custom Reports (If you don’t have Platform services, then go to Customization module). Click Add to add a new report.
- Walk through each step of the Wizard. If a step is not listed below, then nothing needs to be done on that step.
-
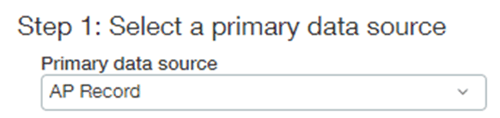
- Data Source: AP Record
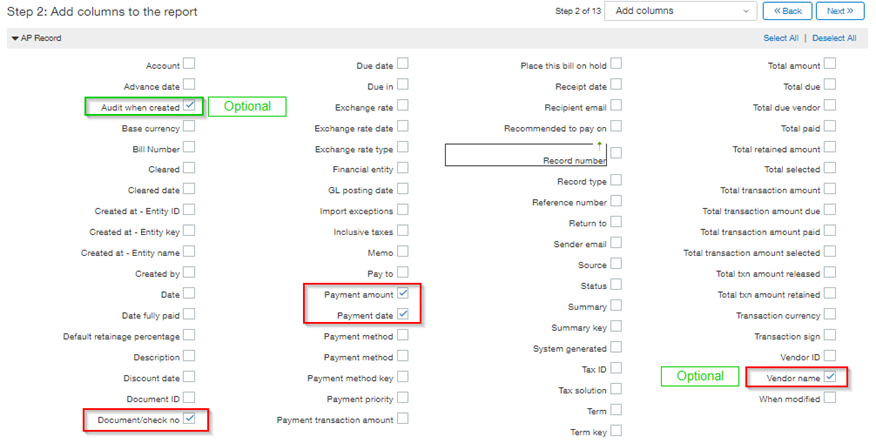
- Key Fields- confirm with your bank which fields are required, but typically you will need Check #, Check Date and Amount at a minimum. You may also want vendor name and account number. Audit date can be added while testing the report to confirm the data being pulled.
 If you have multiple accounts, you may need to add the bank account number. Expand “Financial account” section and then expand “Bank account” section to find the Account number.
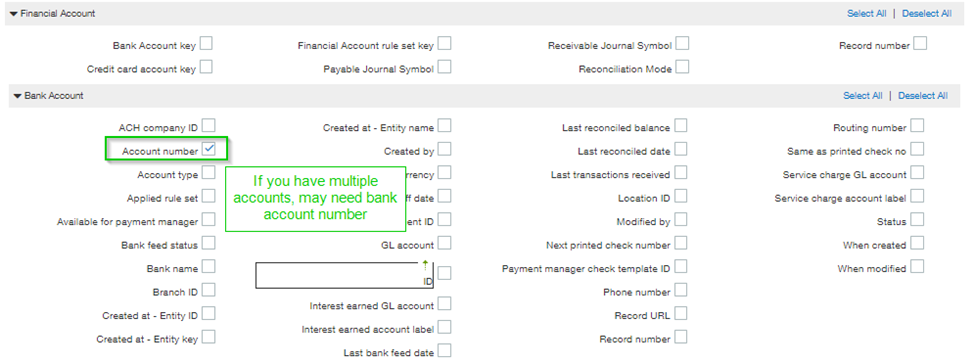
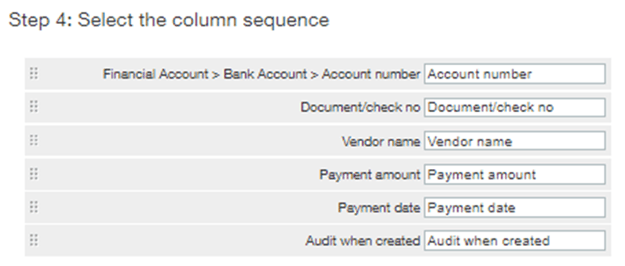
- Put columns in the sequence as requested by the bank
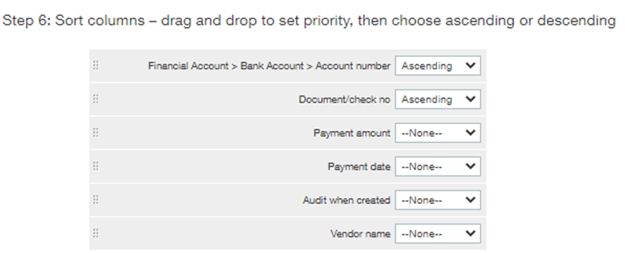
- Determine how to Sort Records – for example by Account and then Check #
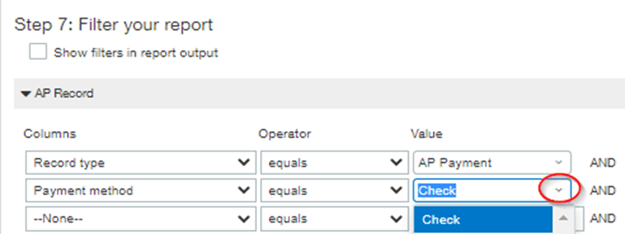
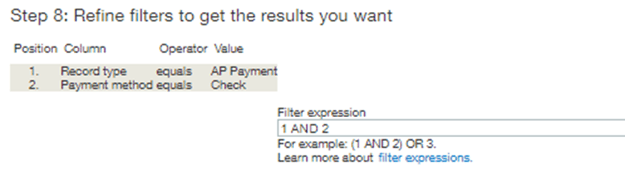
- Filter the data to only return Check payments. Note: there may be multiple Payment methods in column drop down, select the one that allows the Value to be a drop down list of payment methods.
- Reporting period can be set to “Today” if the pospay report will be run the same day as the checks are printed.
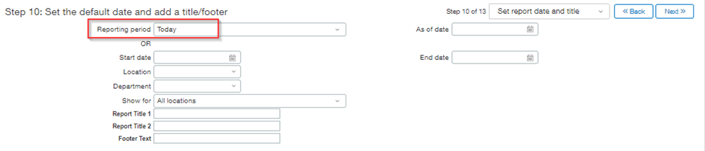
- Include additional prompts if Needed, for example, may want to filter to Account number if you have multiple.

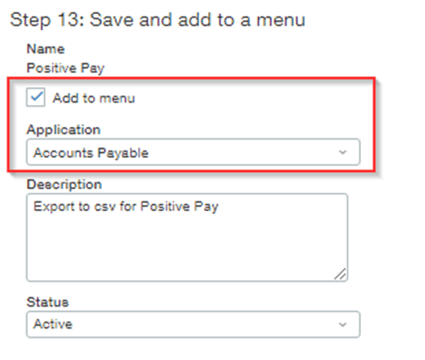
- Give report a Name & Add report to your menu.
- Data Source: AP Record
-
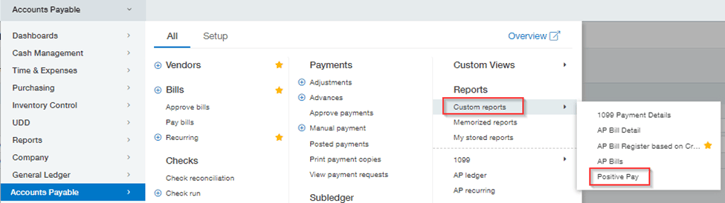
- Refresh your screen and then go to AP> Custom Reports to run report. Validate the report against the AP check register to make sure the correct information is being pulled.
Export report as csv