Increasingly in today's digital world, most transactions are processed using credit cards and we have previously covered how to refund a credit card transaction in Sage X3. Often times for very large transactions the limit on a credit card is too low to cover the entire purchase so a customer may need to pay using a check. Checks are slightly more complicated since they're not 100% digital and a cached check can't typically be reversed. Instead you'll likely need to print a refund check to properly balance the transaction. So how do you refund a check?
Use the following steps to process a refund check using the AP Payment Entry transaction.
- Expand A/P-A/R Accounting, Payments, Payment Receipt Entry
- Select the payment entry transaction used for issuing checks (ex. PAYAT)
- Create a new Payment
- Enter the BP (Customer)
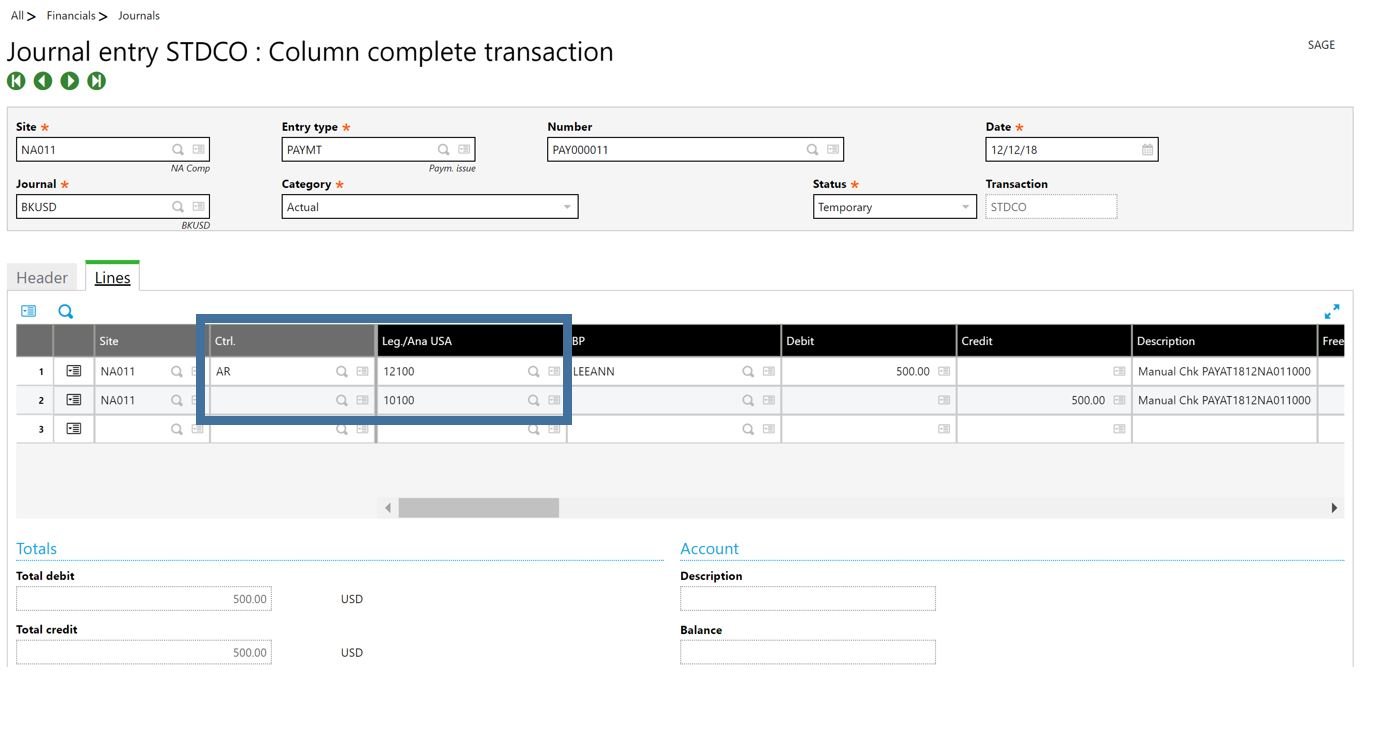
- Confirm the ‘Control’ field is set to the Account Receivable collective account. (The default may be Accounts Payable)
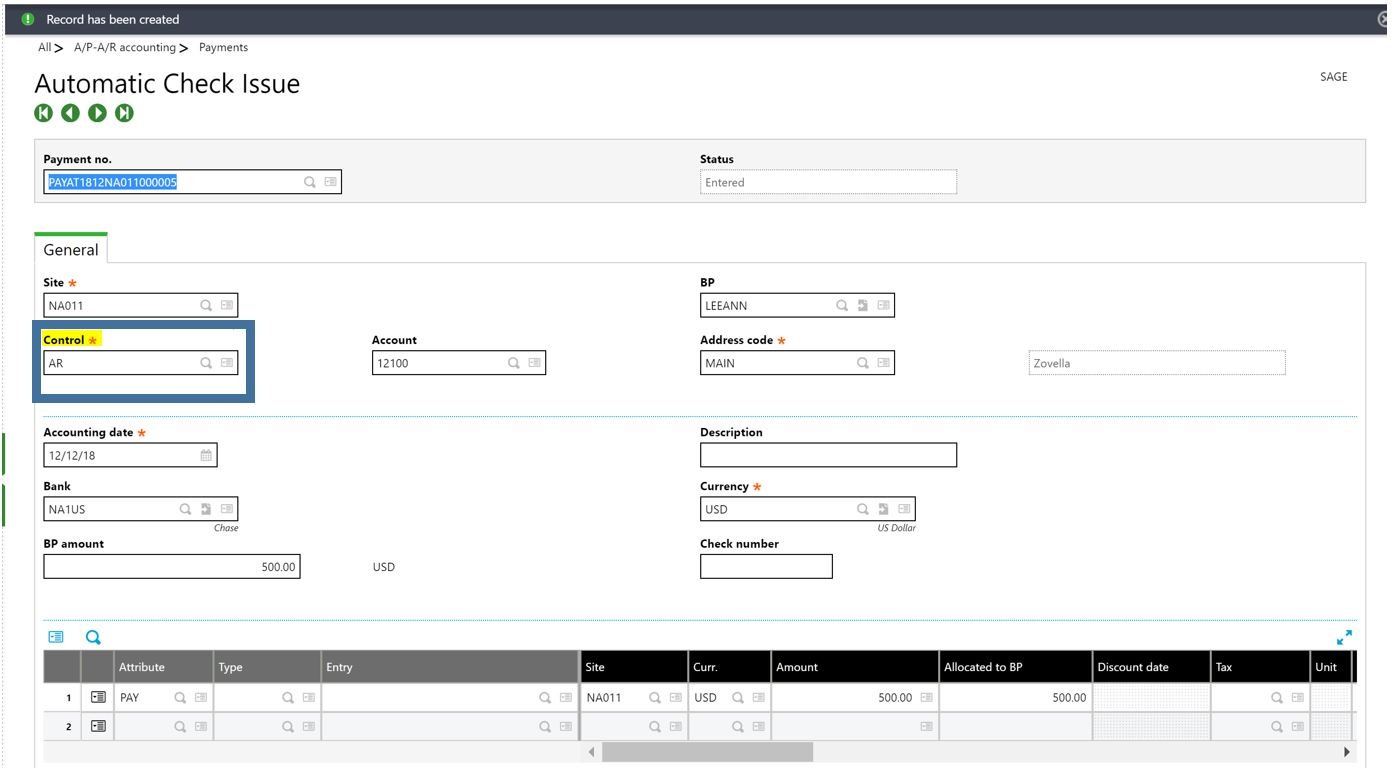
- Enter the Bank and BP amount.
- If the grid is left blank the refund can be applied to another open document later using manual matching.
- Click Create.
- Print the Refund check.
- Post the Payment and review the ‘Accounting Document’.
- Notice that the GL Journal posting affects the AR account instead of AP.