![]()
Setting up Default Bank Account in Sage X3
When working with Sage X3, it can be incredibly helpful to set up a default bank account for payment or receipt entry. With this in place, users can enjoy faster data entry processing and a reduced chance of errors. By following the simple steps outlined in this post, you can easily set up payment entry so that the bank account defaults from the supplier or customer.
Faster Data Entry Processing in Sage X3
- Go to Setup and select A/P-A/R Accounting followed by Payment entry types and select the payment entry screen (RECCH).
- Click on the Entry tab and select the Bank ‘Mandatory’ checkbox to ensure that the bank account is mandatory for payment entry.
- Save and Validate to complete the setup process.
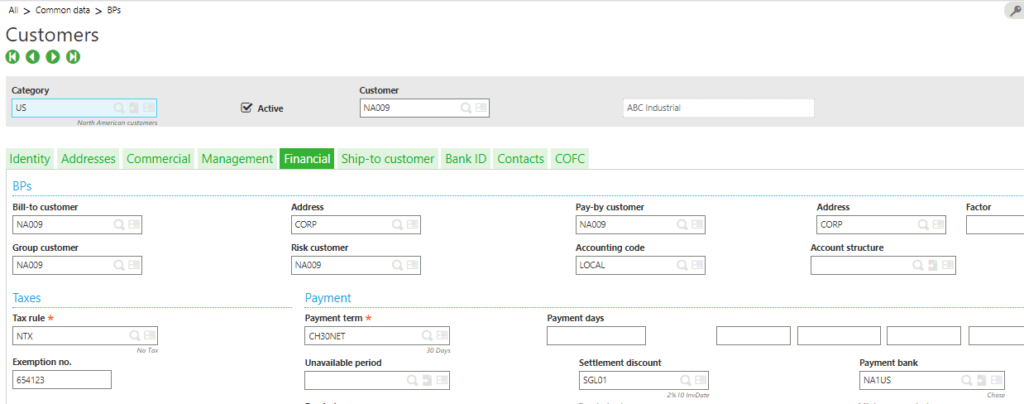
 Go to Common Data > BPs > Customers (or Suppliers).
- Select NA009 and click on theFinancial.
- Assign NA1US to the ‘Payment Bank’ field and Save.
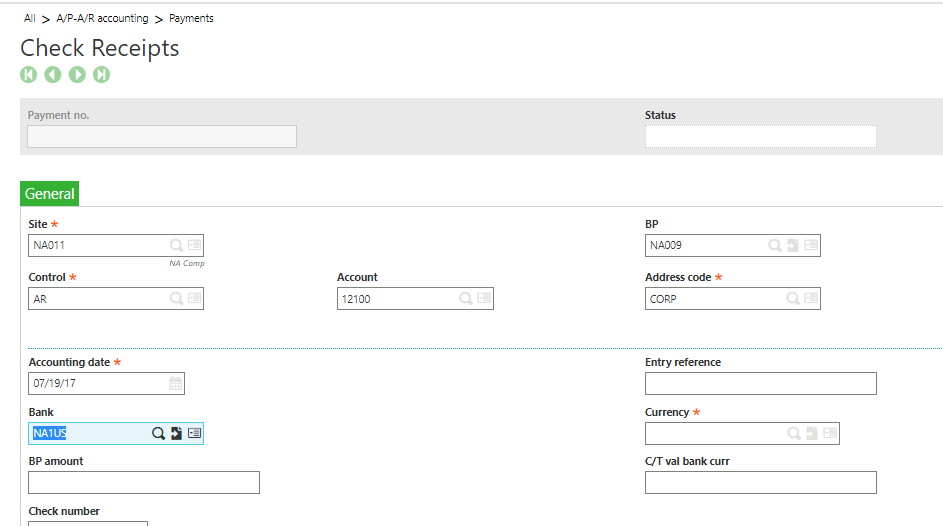
 Go to A/P-A/R Accounting > Payments > Payment/Receipt entry.
- Create a new Cash Receipt using the RECCH payment entry screen.
- Enter the ‘Site’ and ‘Customer’.
- Tab to the ‘Bank’ Field. Note the Bank Setup for the Customer will default in the field.
Got Questions?
Please contact us if you need help navigating Sage X3.