


If you're anything like me, the idea of taking a vacation is exciting but it also comes with a side dish of anxiety. Not because I'm leaving behind my beloved Kitty, not because of travel delays, lost luggage, or harsh weather. It's all about what my inbox will look like that first day back to work.
Here are some tips and tricks that I used to keep my Outlook inbox organized and email anxiety to a minimum.
Outlook Inbox Tips & Tricks
Inbox vs. Individual Folders and Rules vs. Conditional Formatting
Don't get me wrong. I live and die by Individual folders in Outlook. However, my organizational prowess takes a hit if I set up too many rules. When I first started my career, I had folders for everyone I worked with and a rule to send their emails directly to those folders. As the company, and my role within it, grew, I was losing track of those emails. I knew I read it, but what did I do about it? Or worse, I read it and forgot about it because it was in their folder, not right in front of me.
Not long ago, I took a hard look at how I was using rules to immediately file emails and decided that it wasn’t working for me. In the olden days of paper and file cabinets, you would never file anything unless you had finished the related task. So, I took a deep breath and ditched most of my Outlook rules.
Along came the mountain of emails that I had so dreaded. Let me tell you, Outlook Conditional Formatting saved by life, my job, and my sanity.
Do we really need every single email that hits our inbox? Absolutely not! Do we really need to read and respond to the boss first? Always! How do we make sure we’ve found all of the emails from our VIPs? We set up Conditional Formatting. Using Conditional Formatting, you can set rules to have all emails from your boss show in a bright red, bold italicized font. Emails from the payroll department can have a green font (show me the money). The options are nearly endless. Using Conditional Formatting draws my eye to the critical emails effortlessly. And yes, I do leave them in my inbox until I’ve dealt with the issue. I only file the last email in the thread to the appropriate folder.
This method almost prioritized emails for you! So how do you set up Conditional Formatting? It’s easy!
-
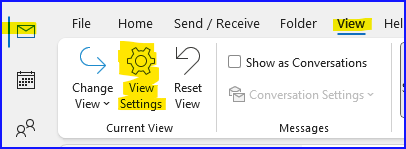
From your Outlook Email page, Click on View, then click on View Settings:
-
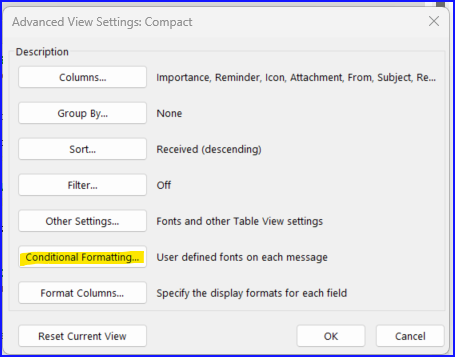
Click on Conditional Formatting:
-
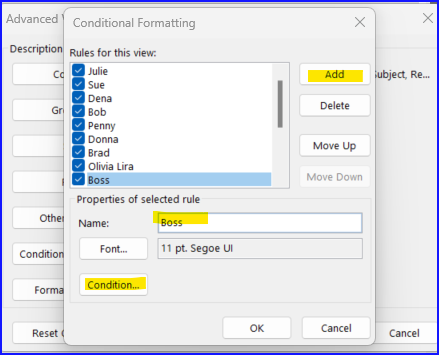
Click on Add and Enter a name for your new rule, then click on Condition:
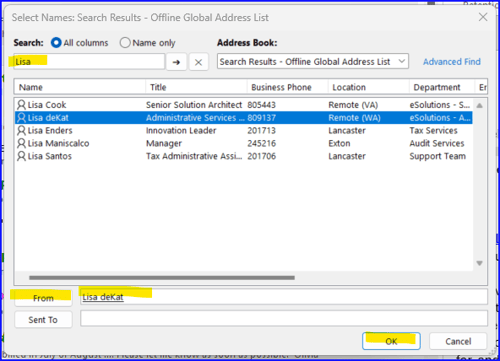
- This next screen gives you options for your new rule. You can set the condition to be based on who the email is from or keywords. You have lots of options. For this example, I want to make sure I’m seeing the emails from my boss, so I’m going to search for her email address by clicking on From and using the search menu:
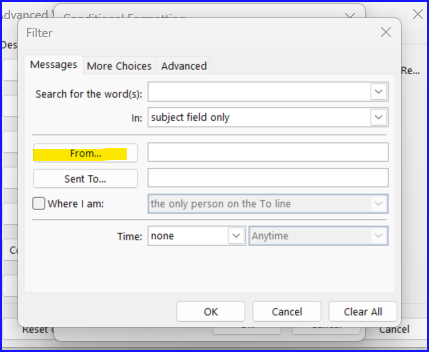
Quick note on this piece: Let the system fill in the email address from the address book so that your rule works properly. Typing the email by hand can lead to errors with the rule.

-
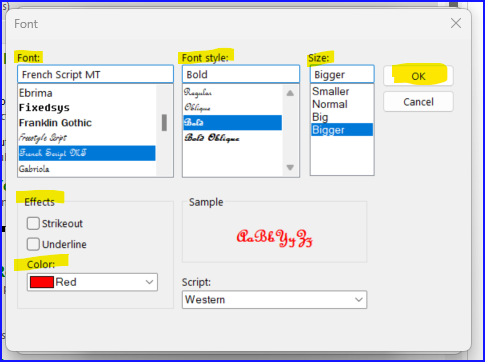
So here comes the fun part! Click on the Font button and pick a font, color, size, whatever you think will draw your eye to an email from that sender. Play around with it and find something that really draws your attention. You can always come back and edit the rule, if you want to. Click okay and it will apply the rule to your Inbox.

You will notice that once you move an email with a conditional format out of your inbox, it loses the format. However, if you move it back to your inbox, the conditional format will come back with it. Pretty cool!
Move all emails from a specific sender into a folder
Now, if you’re a die-hard rule follower, setting up rules in Outlook is easy. Let’s say that I want to move all emails from a specific sender to a folder I’ve setup just for their emails.
-
First, set up the folder by right clicking on Inbox and selecting New Folder. Give it whatever name you want. I usually use the Sender’s name.
-
Second, while you have an email from that sender highlighted, click on Rules:

-
From that drop-down menu, click on Create Rule:
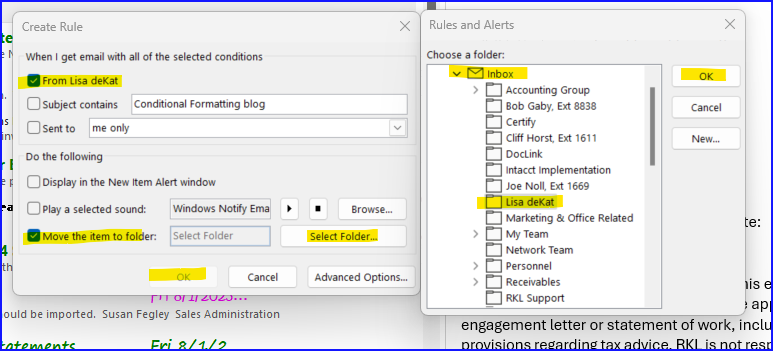
It will even give you the option to move all emails that meet your criteria from your inbox to the newly created folder. Easy peasy!
Both of these tools have options to make the rules and conditions even more specific. Play around and see what works best for you. Once you’ve set your conditions and rules, go enjoy your vacation knowing that you’ll have a head start on organizing your inbox when you return to work.

