

Well we are half way through this crazy adventure I decided to take on. I hope you are finding it useful. Today we will discuss several enhancements you can make to Sales Order. Some of these changes are done to the Customer screen because the values from the Customer Ship-To carry through to the creation of a new order for the said Customer. I have broken this down into 3 enhancements in the blog just for clarity.
Enhancement #1: Default to Ship-To Customer tab to have the Pick Ticket and Pack Ticket and Work Days automatically checked on new customer
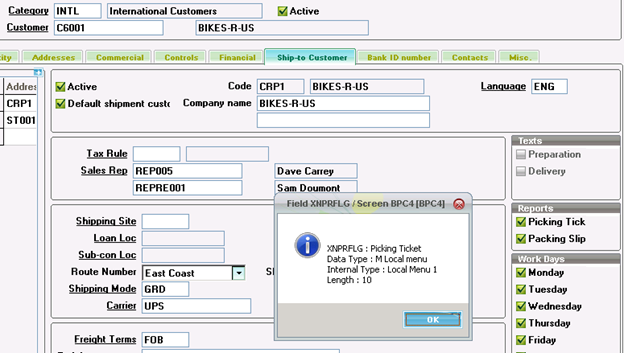
The purpose of this change is so that when you create a Sales Order for this Customer and corresponding Ship-To the Pick Ticket and Pack Ticket will automatically be checked on the new order. The first thing you need to know is what form and what fields. One of the easiest ways to determine this, we have already covered, the use of the F6 hot-key. So go to the Customer window, Common Data -> BPs -> Customers, then the Ship-To Customer tab. Click on the Picking Tick or Packing Slip under the Reports section. Now press F6. I pressed F6 while on the Picking Ticket field in this screen shot. Now I know the Screen name (BCP4) and the Field Name (XNPRFLG).
Picking Ticket
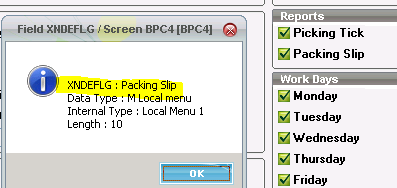
Packing Slip
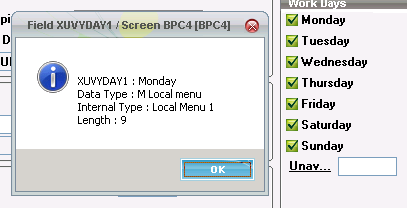
Working Days (here is Monday, you get the idea for the rest of the Work Days)
All of these changes can be made using Development -> Processes -> Screens -> Screens.
Select the BPC4 screen and click on the Fields tab. You want to change the Default Value column to 2 for the Picking Tick, Packing Ticket and Days of Week (Monday – Friday). First locate the Field. It will have the same name without the 'X'. Scroll to the right to the column Default Value. Save your changes. Then you need to perform Validation on the screen to publish the change.
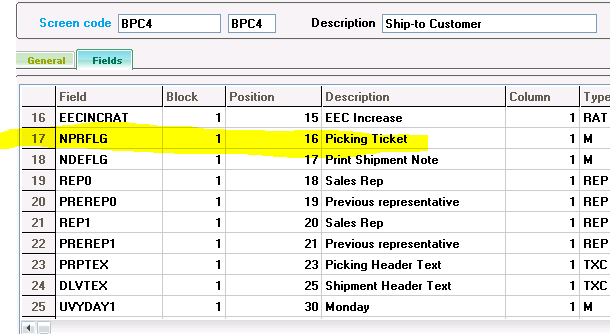
NOTE: The reason this Default Value is 2 is that this is 1 for unchecked and 2 for checked.
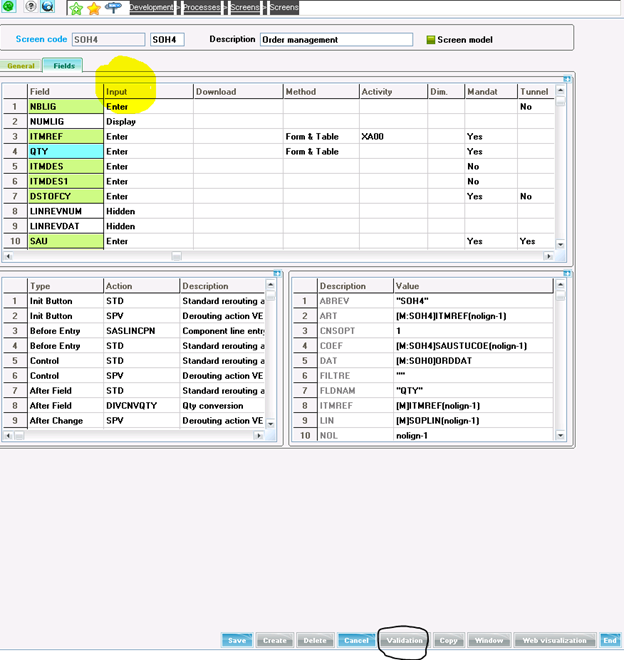
Enhancement #2: When entering sales order lines, product and quantity are the only fields to which we need to tab, how to limit the columns of entry on Order Lines…
Navigate to Development -> Processes -> Screens -> Screens.
Select Screen SOH4 and go to the Fields Tab. Scroll to the right to the Input column. Change the Input values to meet your requirements. In the case I was trying to satisfy, I would change the Input value to Display for all of the Fields except the ITMREF and QTY. Save your changes. Then you need to perform Validation on the screen to publish the change.
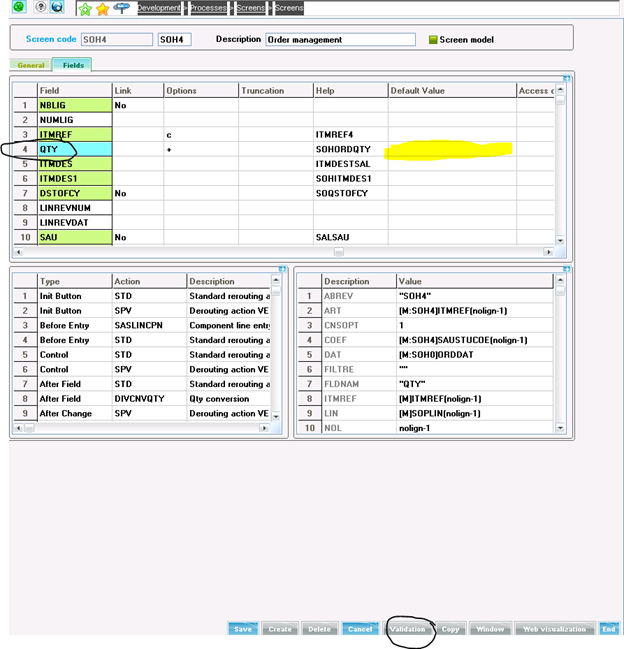
Enhancement #3: Can we default a sales quantity of 1 to each order line that we add?
Navigate to Development -> Processes -> Screens -> Screens.
Select Screen SOH4 and go to the Fields Tab. Select the QTY Field and scroll to the right. Enter the Default Value, in this case we were making it 1. Save your changes. Then you need to perform Validation on the screen to publish the change.
I hope you found this assortment of enhancements valuable. While you may not need these exact changes, I was also trying to cover a wide range of changes so that you could see how the SAFE X3 framework can be used to enhance your installation.