There has been some confusion regarding the how to add new salespeople to eBusiness Suite for Sage 500 (formerly MAS 500). So I am outlining this process here to provide a tutorial and hopefully eliminate future confusion.
Some of this confusion has been around how Sage used to handle the assignment of user id’s to salespeople for their previous module known as eSalesforce. eBusiness Suite for Sage 500 DOES NOT USE THAT FIELD!
If you are creating a new Salesperson you will do this in Sage 500 ERP. Go to Accounts Receivable->Maintenance->Maintain Salespersons
Enter a new Salesperson

NOTE: If you see a field on the above screen “UserID” you do not need to use this for eBusiness Suite.
Adding/Assigning a new Salesperson to a Login in eBusiness Suite
Login into eBusiness Suite for Sage 500 ERP as an Admin level user. You will need to have access to the Configuration module.

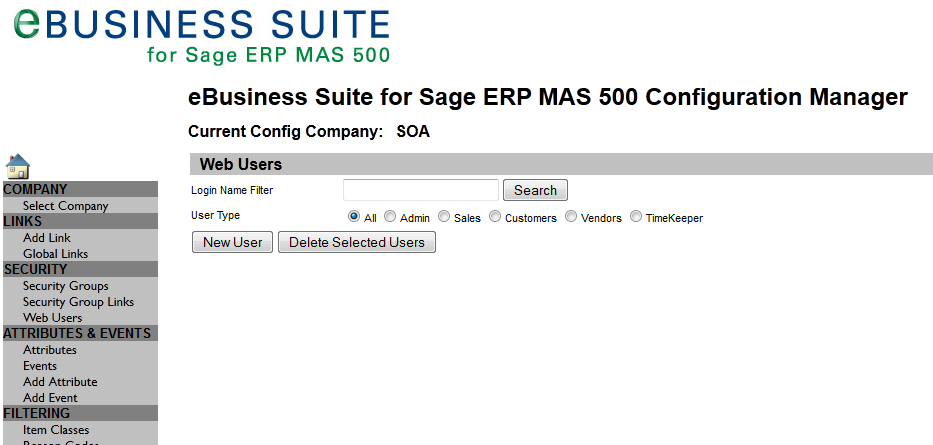
Select the option for Web Users. You will be presented with the page below. Click on the New User button.
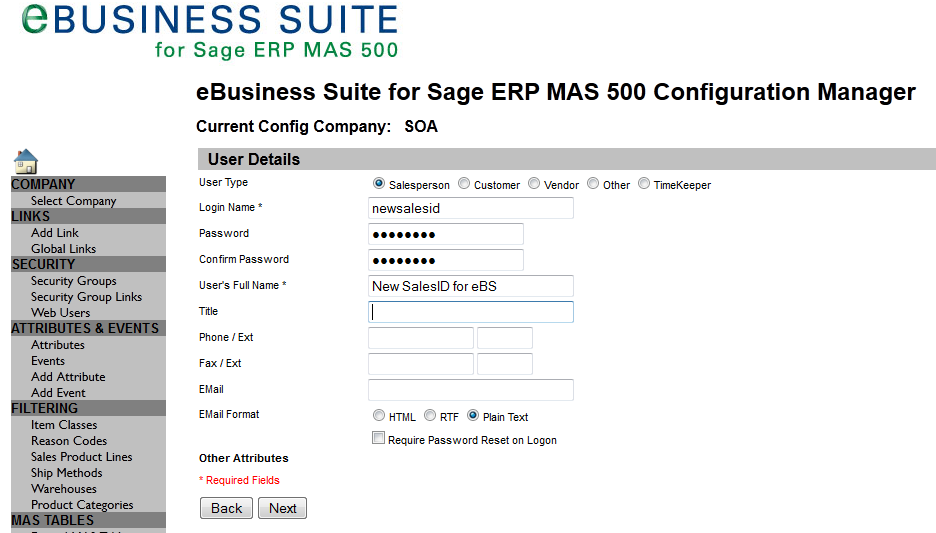
Click on the Salesperson radio button and fill in the necessary information. Click Next.
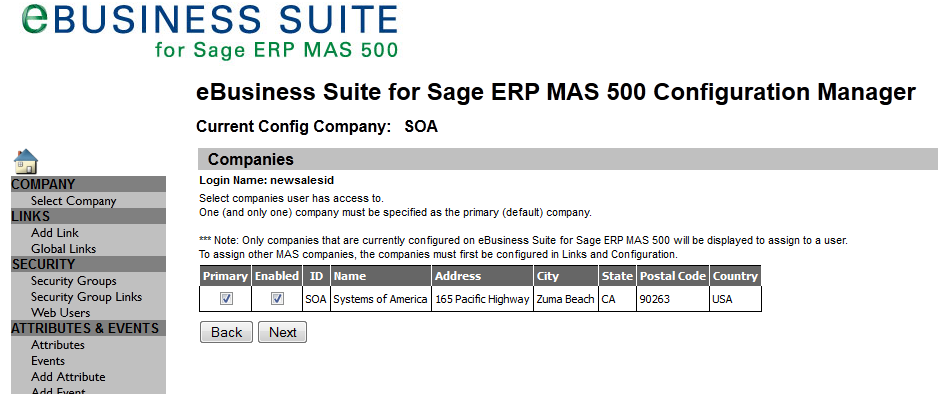
Select the Primary and Enabled for the company’s the user will be associated with and click Next.
Click on the Edit button to attach this login name for the selected company to a Salesperson ID.
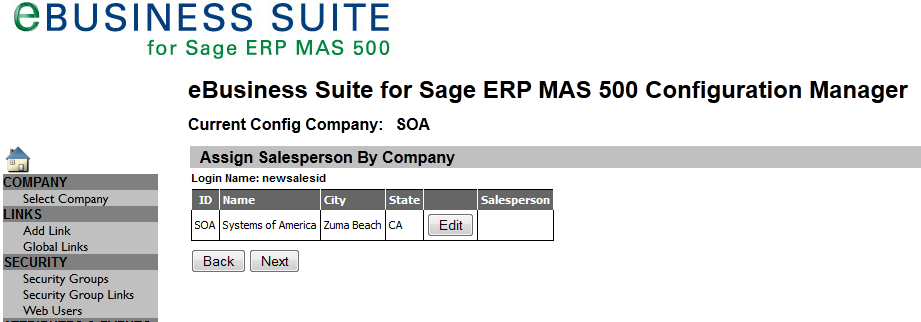
Click on the Search button to get a list of the Salesperson ID’s from Sage 500 ERP, as shown below.
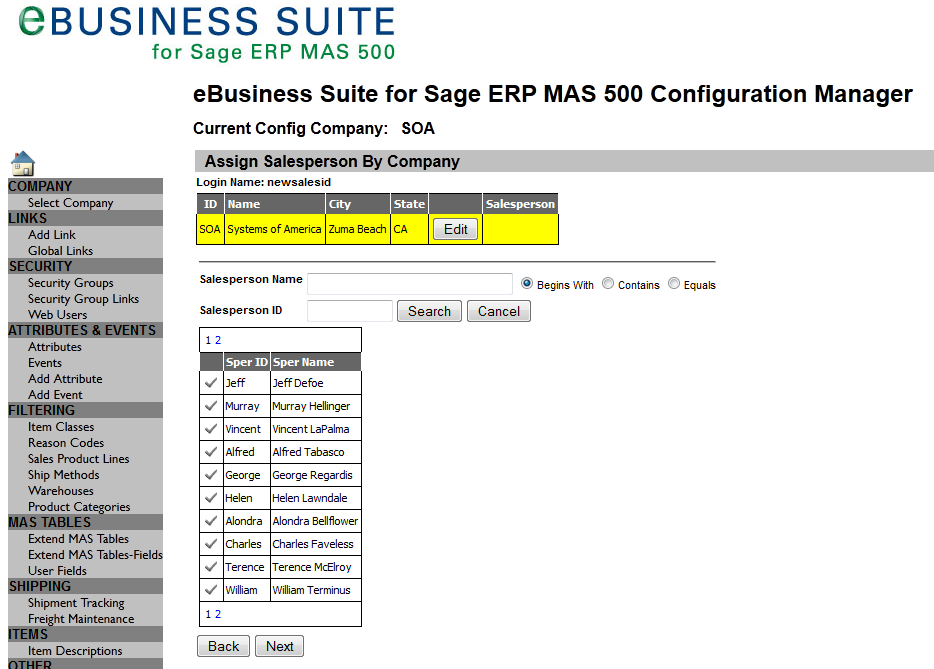
Select one of the Salesperson ID’s by clicking on the checkmark in column as shown above.
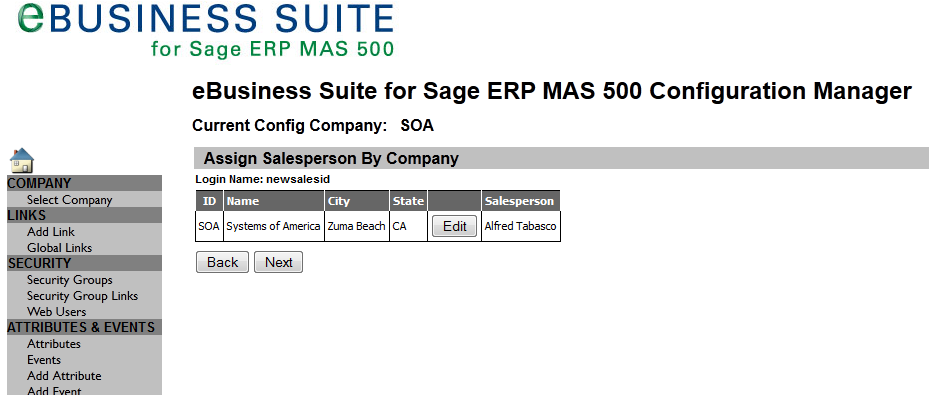
Click Next above to continue. You will go to the Security Groups page shown below. Highlight the Security Groups that you wish to assign to this login name and click on the ‘>’ to move. Below I have only assigned the Salesperson Security Group. Click Next.

This will present the Links page as shown below. The Links you are presented with are the ones defined for the Selected Groups from the prior page based on what was assigned in the Security Group Links and click on the ‘>’ to move. Click Finish.

The new login name for the Salesperson is now created. You can click on the Sales radio button below and click Search to display your new record.