


**Please note that intermediate experience with MongoDB is recommended for this process; DO NOT ATTEMPT without a system admin and knowledgeable MongoDB consultant. Contact our support team for help.**
In Sage X3, the current date does not automatically populate in date fields by default. Setting a date within the system simply selects a fixed value that does not update on a daily basis. Prepopulating the date fields with the current date involves directly accessing underlying MongoDB documents using Studio 3T, a specialized database tool.
Steps to Autofill the Date Field
- Navigate to Sage X3's Users Admin
- Set up the user code in the UserPreference Collection
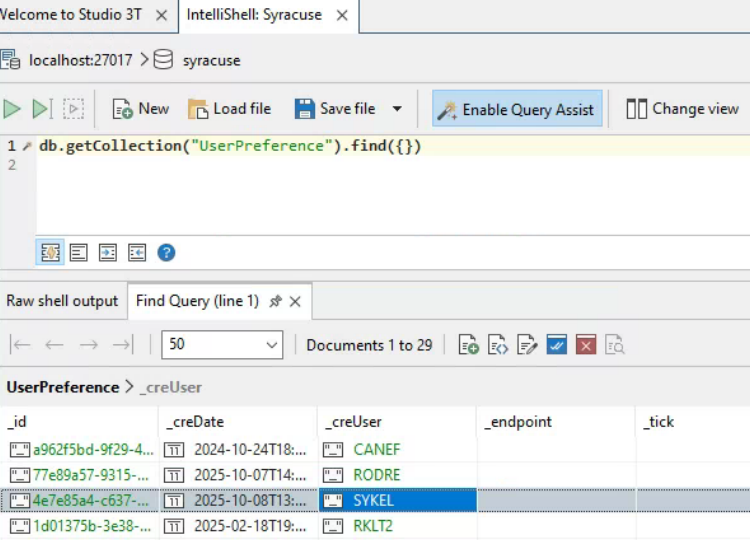
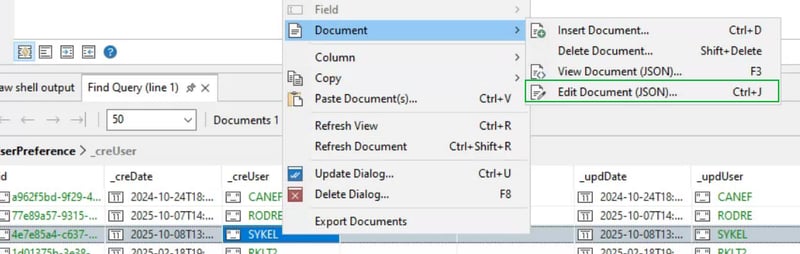
- Then right-click the user code, go to "Document" and select "Edit Document (JSON)..." or press "ctrl+J"
- Copy the entire code into a text editor, such as Notepad++, for backup purposes.
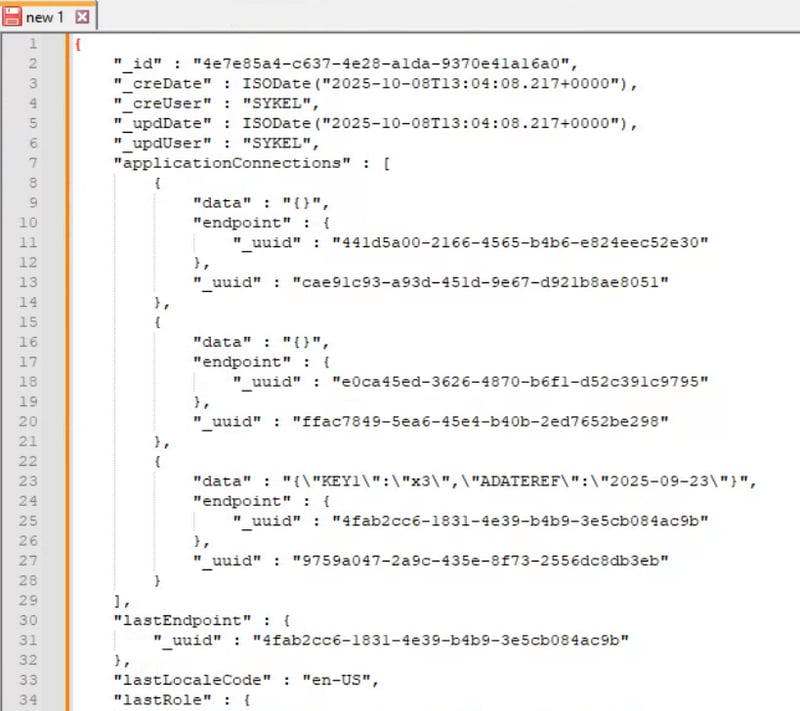
- Locate the section with ADATEREF.
-
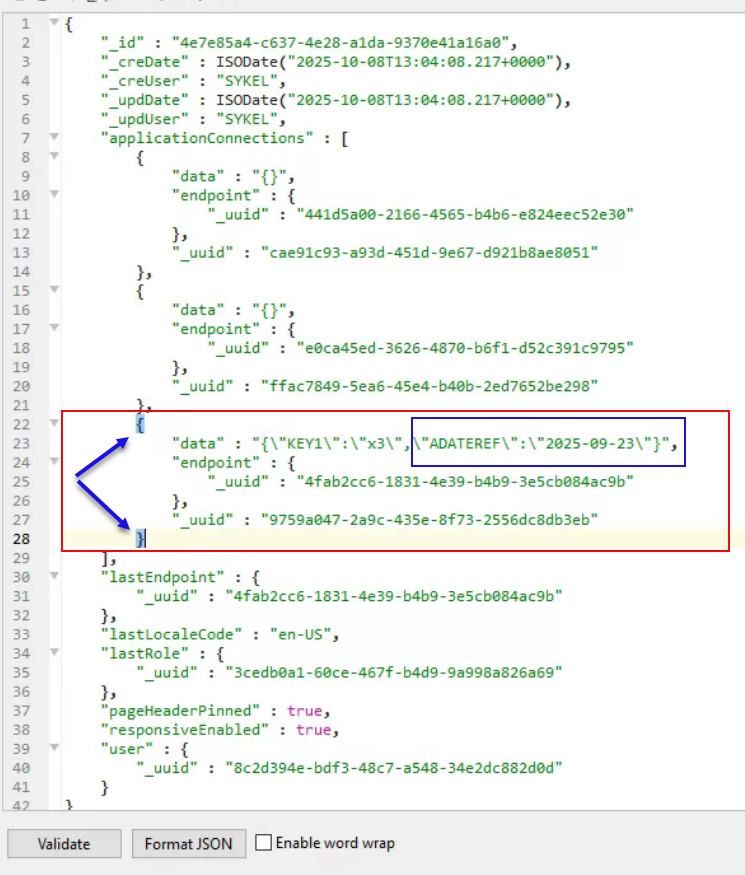
Click on the opening curly brace, which automatically highlights its corresponding closing curly brace. This defines the section of the document to delete. Include the opening and closing curly brackets.
-
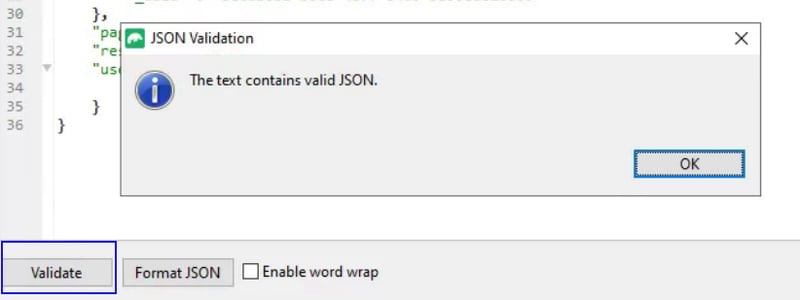
After deleting the section of the document, click the "Validate" button. WARNING: If an error occurs, stop and restore the document's contents from the previously made backup. If no error occurs, save or update the document.
- Log out of Sage X3, go to your browser's settings and clear your cache/cookies.
- Now, when you log back into Sage X3, the autofill for the date will work.
Want More Sage X3 Features & Functions?
For videos on Sage X3, visit our YouTube page and subscribe to stay up-to-date with the latest insights and tutorials. Our channel is dedicated to providing valuable resources for businesses looking to optimize their financial management with Sage X3.
 Check out these blogs to help get you started!
4 Functions to Use in the Preventive Maintenance Solution
How to Add a New Column to the Left List
How to Set Up 4GL Formatting in Notepad++
How to Change Default Stock History Days