

Recording a deposit and applying it to one or more vendor invoices can be confusing at first, especially when the payment needs to be tracked as a prepayment before it is fully used. This guide walks through the basic steps to enter the prepayment, apply it to open invoices, and confirm that the transaction was posted correctly.
Step 1: Enter the Prepayment in Accounts Payable
- Open Accounts Payable > Main > Manual Check and Payment Entry
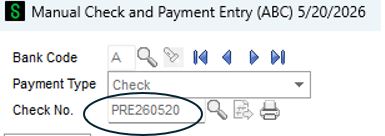
- Select the Bank Code and enter the Check No. using the prefix PP or PRE followed by YYMMDD format
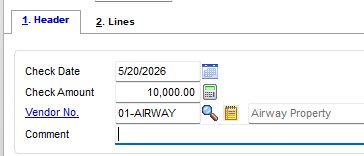
- Enter the Date and Check Amount and Vendor No.
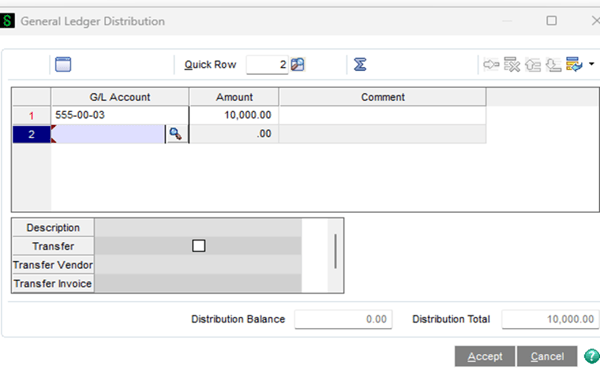
- Click Lines tab and select G/L Distribution
- Click Create G/L Distribution Icon
- Use the Invoice No. to identify the prepayment when applying the prepayment to the invoice (in Step 2)
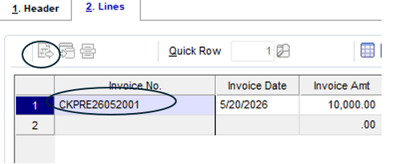
- Use the Invoice No. to identify the prepayment when applying the prepayment to the invoice (in Step 2)
- Enter G/L Account and Amount. The system will create an invoice starting with CK, followed by six-digit Check No. and Entry No.
- Click Accept and post the Prepayment Register.
- Click General Ledger Distribution.
- Enter G/L Account and Amount.
- The system debits the G/L account entered in the G/L distribution and credits
Step 2: Apply the prepayment to the Accounts Payable Invoice
- Open Accounts Payable, Main, Invoice Data Entry.
- Select the vendor and enter the invoice number to adjust.
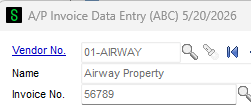
- Click the Adjust button
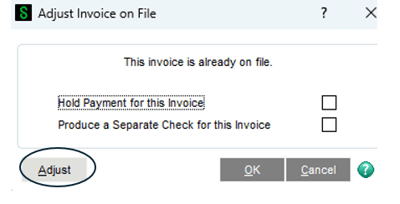
- Leave Adjustment Amount field blank
- Click the look up at the Prepaid Invoice field
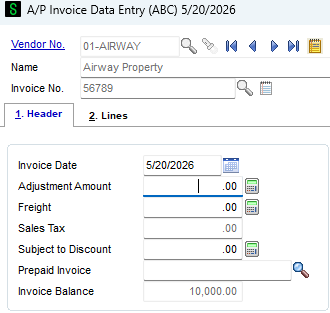
- Select the prepayment (from Step 1) from the Invoice List
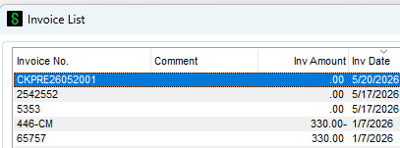
- In the Prepayment Amount field, enter the amount being applied to the invoice as positive. Ex. $10000.00
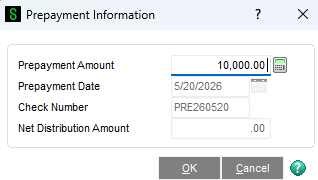
- Click OK
- On the Lines tab, enter the G/L Account and enter the amount as negative ex. -$10000.00
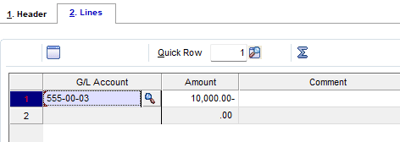
- Update the A/P Invoice Register
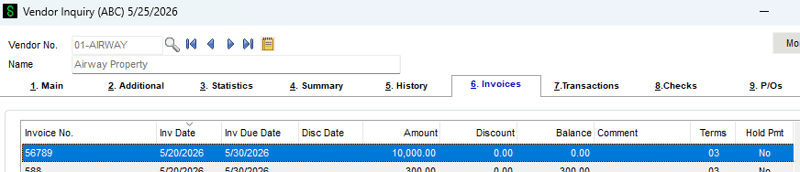
- Open Vendor Inquiry, Invoices tab and select the Vendor No.
- Highlight the invoice that was applied to the prepayment showing a balance of 0.00
- The bottom of the screen will show the Invoice, Adjustment and Prepayment

For additional assistance in recording accounts payable prepayments and applying them to invoices, please contact RKL eSolutions.
Looking for More on Sage 100?
For more helpful tips and tricks about Sage 100, subscribe to our blog and stay up-to-date with our latest tutorials. We're dedicated to providing valuable resources for businesses looking to optimize their financial management with Sage Intacct.
 Check out these blogs to help get you started!
What's New in Sage 100 Version 2026
Understanding the Difference Between Auto-Complete and Enhanced Auto-Complete in Sage 100
How to Distribute Reports Using Sage Intelligence for Sage 100 Users