Sage X3’s Version 12 Patch 27 included a new feature that allows users to have the balance verification process ran when closing each period and running the closing report. In the past Sage X3 only checked the general ledger balances when closing or reporting on the final period of the financial year.
A new parameter (CTLCLOPER) was added so you have the option to check the balances for each period. The benefits of this option allow out of balance issues to be addressed before year end processes.
Setting Up the Balance Verification Process
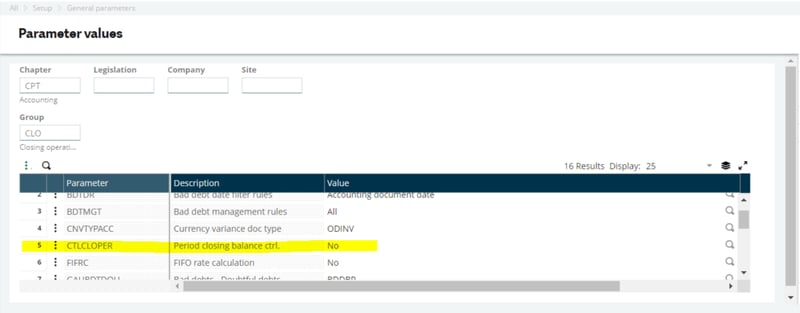
- Go to Setup > General Parameters > Parameter Values
- In the "Chapter" box , enter CPT
- In the "Group" box, enter CLO
- Scroll through the genral parameters until you find CTLCLOPER
- This parameter is set to "No" by default
- When you change this to "Yes" the closing processes from each period takes a longer time to complete.
When this is activated, the control checks will now include:
- Non-blocking control on the Account balance sign
- Account balances
- Pre-consolidated balance checks (if activated)
After activating the CTLCLOPER general parameter, the period checks will be performed when:
- The CLOPER report is ran.
- The period is closed.
- Multi-company period closing processes are performed.
questions?
Have any questions? Don't hesitate to reach out, it's what we're here for!