
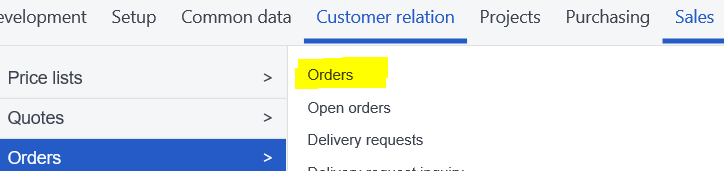
This is the seventh lesson in the series Learning Sage X3. In this lesson, I will give you some basic tips to start customizing your Sage X3 solution. Hopefully, you have read the prior lessons and have some working knowledge of how to navigate through X3. I will cover how to add a customer name column to the list on the left within the Sales Order entry window. First, please refer below on how to access the Sales Order entry window.
Sage X3 Sales Order Entry Screen
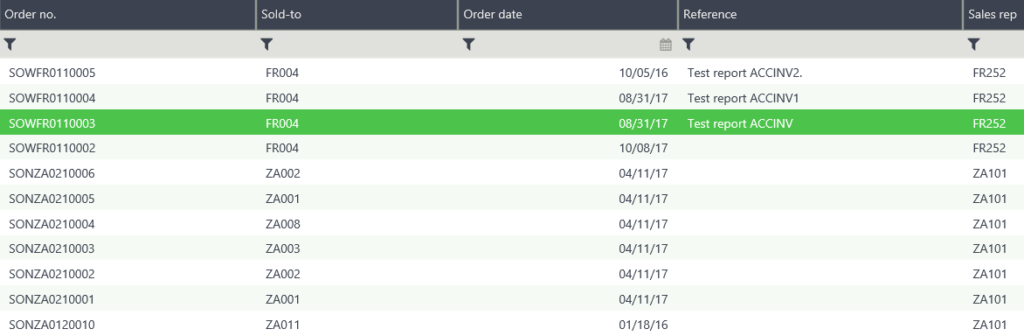
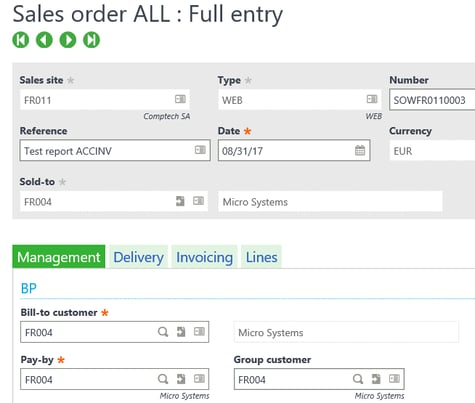
This is what the Sales Order entry screen should look like below in Sage X3 Version 11.

Below is the list of orders you should see on the left-hand side of the Sales Order entry screen. Let's add a Customer Order name field between the Sold-to and Order date fields.
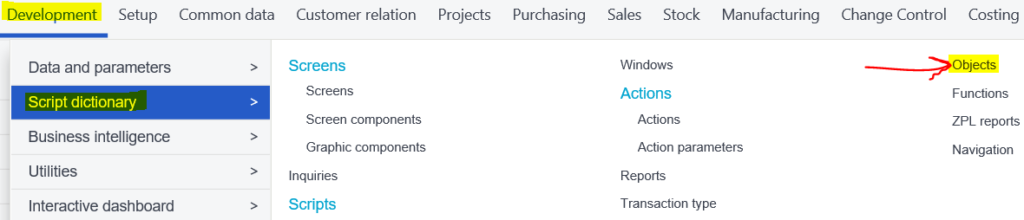
This is more of an enhancement to the base SAGE X3 instead of a customization. The first step is navigating to the Development tab in the mega menu at the top of the system. Development -> Script dictionary -> Objects.
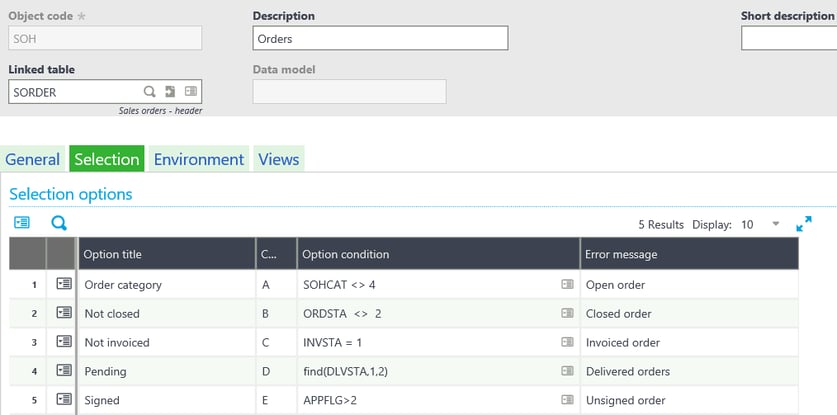
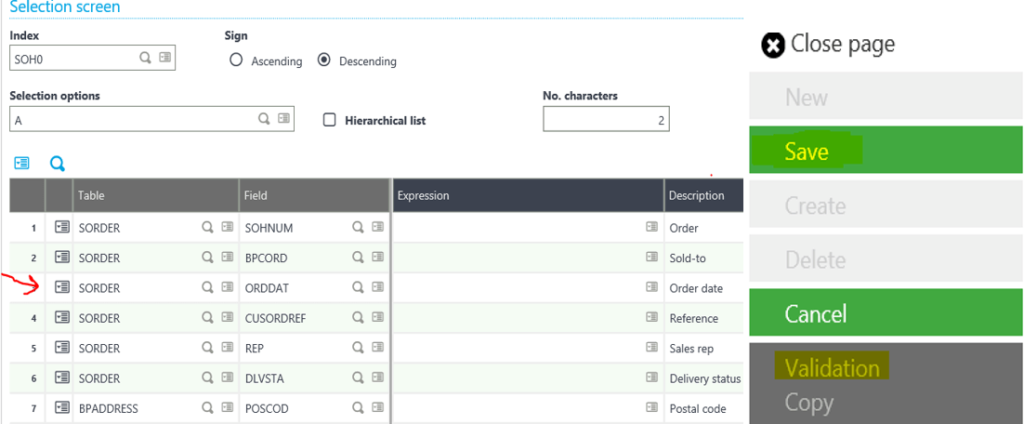
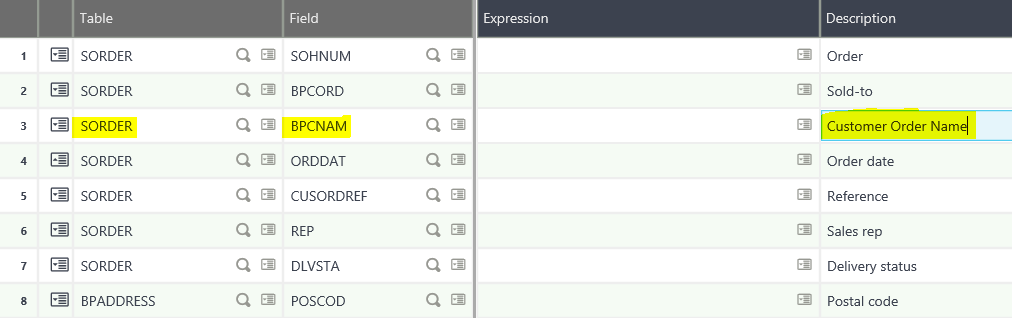
Once you are in the Objects window, go to the Selections tab and enter SOH in the Object Code text box. In the selection screen towards the bottom of the window, select the actions tab on Row 3 and press “Insert new” to add the customer order name field. Enter the table “SORDER” and the field “BPCNAM.” After this, make sure to save your changes on the right side panel and select validation to publish the change.
Now you will see the new Customer Order Name field for the left list selection.
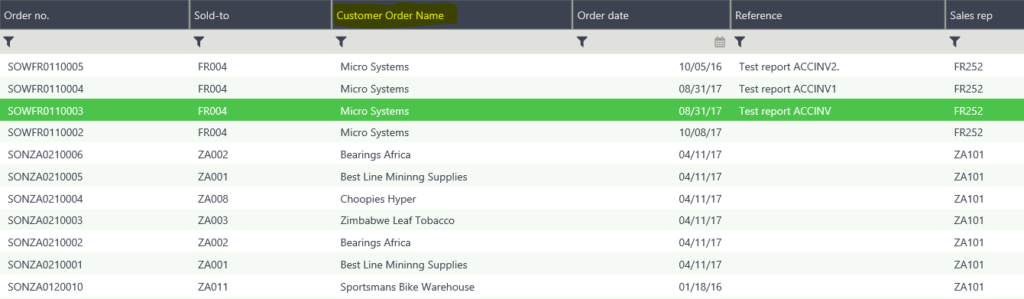
Now you can go back to the Sales Order Entry screen. You will now be able to see the newly added Customer Order Name column in the left list of sales orders.
This same procedure will work for any left list.
Stay Tuned for Lesson 8
This is the seventh post in Learning Sage X3. The next post (Lesson 8) this series covers How to Export Data from Sage X3 will post on November 7th, 2017. Other lessons in this series can be viewed at:
Lesson 1 of 14 - Important Acronyms and Definitions
Lesson 2 of 14 - General Navigation and User Interface
Lesson 3 of 14 - Sage X3 PU 11
Lesson 4 of 14 - Setting up Chart of Accounts
Lesson 5 of 14 - Sage CRM for X3
Lesson 6 of 14 - How to Add a Custom Report
Need Help with Learning Sage X3?
Contact us if you have more in-depth question or want to Learn Sage X3 or to request help with your system.