

Sage Enterprise Management (FKA Sage X3) Version 7 and forward includes an Add-In for integration with Microsoft Office. This Add-In allows a user to export data from the browser client of Sage X3 to Word or Excel. The Add-In requires the workstation to have Microsoft IE 10 or greater and Microsoft Office installed. The Add-In also must be installed on each workstation that needs to integrate Sage X3 with Microsoft Office. This creates a challenge when there are a large number of workstations accessing Sage X3 that require this Add-In. In Sage X3 Product Update 9, Sage has place the Add-In on the Administration menu for easier access.

However, some customers do not want their users to have access to this menu or to be installing software on their workstations. So we have developed a process for launching an unattended installation of this Add-In from a windows bat file that could be called via Group Policy as a login script installation. Here are the steps:
- Download the Microsoft Office Add-in from the Administration menu in Sage X3 Product Update 9
- By default the SyracuseOfficeAddinsSetup.exe will be placed in your windows downloads directory
- Copy the exe into a shared location that is accessible by the workstations you want to push the installation to. For our example, we have created a shared folder on our X3 application server called tmp. It is accessed via a UNC path at \\X3AppSvr\tmp\SyracuseOfficeAddinsSetup.exe
- Create a Windows Bat file in the shared tmp directory. We called ours X3OfficeAddInInstall.bat and here are the contents of the Bat file:
"\\X3AppSvr\tmp\SyracuseOfficeAddinsSetup.exe" /s /v" /qn"
- Here is an explanation of the switches we used:
/s – instructs the installation to run silently
/v” /qn” - tells the installer to pass /qn to msiexec, which means the installer will not display an interface
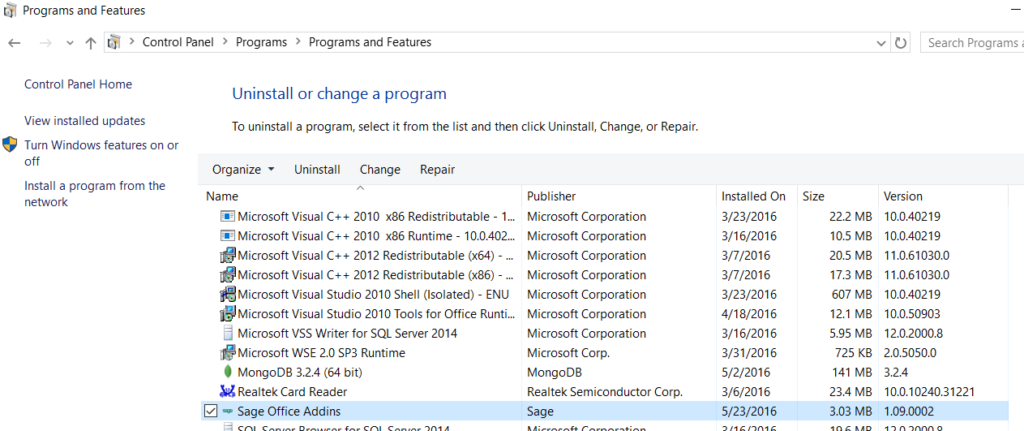
- Once the Bat file exists, right-click it and run it as Administrator to verify it installs the Add-In correctly. You should see Sage Office Add-ins in your programs in the Control Panel:
- Lastly, schedule deployment via Group Policy from a login script by referencing the Bat file we created in step 4.
This process allows an Administrator to push out the Sage X3 Office Add-In program to multiple workstations without the need for a user to manually launch an installation program. This process provides greater control over the rollout of the Add-In and insures it gets installed properly and the same way for everyone. It also enables us to lock down access to the Sage X3 Administration menu so a general user does not require access for this particular feature.

