
This is the tenth lesson in the series Learning Sage X3. In this post I will be going over how to configure fields in Sage X3 to be mandatory. It is easy to configure and fairly simple but a very useful tool. Please refer below for two different examples. In Scenario 1- the shipping site should be entered on the ship-to customer tab when a customer record is created and in Scenario 2- I will review how to make sure products get created with a normal tax class.
Scenario 1: Shipping site needs to be entered on ship-to customer tab on the customer record when they are created
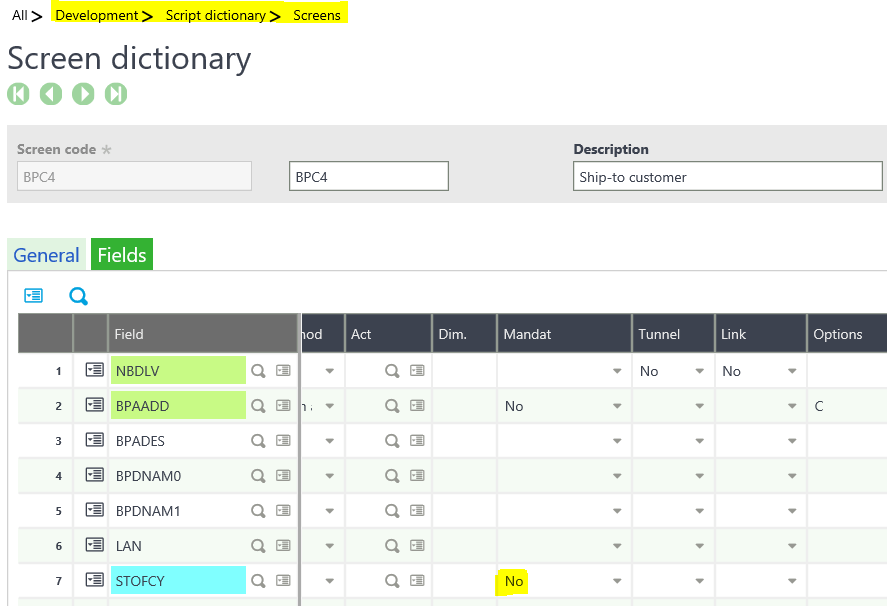
This is used to confirm when a customer record is created that a default shipping site gets added to the ship-to customer so it’s set when customer orders are created. To do this, go to Development>Script dictionary>Screens Function in Sage ERP X3.
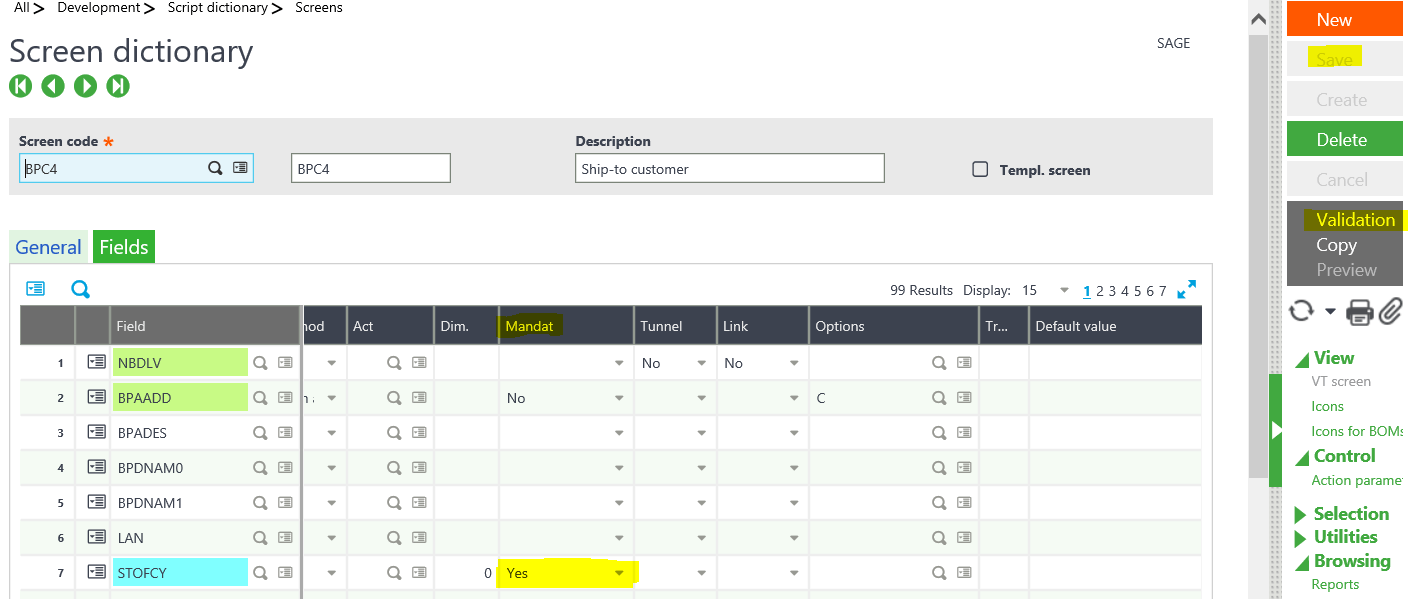
Select the BPC4 screen code and navigate to the fields tab. Scroll to the right until you see the Mandat (Mandatory) field. It should be blank, no, or yes. To change it to mandatory click on the drop-down arrow and click the down arrow to select yes. This will make it mandatory.
After changing the mandate column to yes, navigate to the right side of the page and click the save button. After you have saved your changes, click validation to publish the change.
Scenario 2: Making sure Products get created with Normal Tax
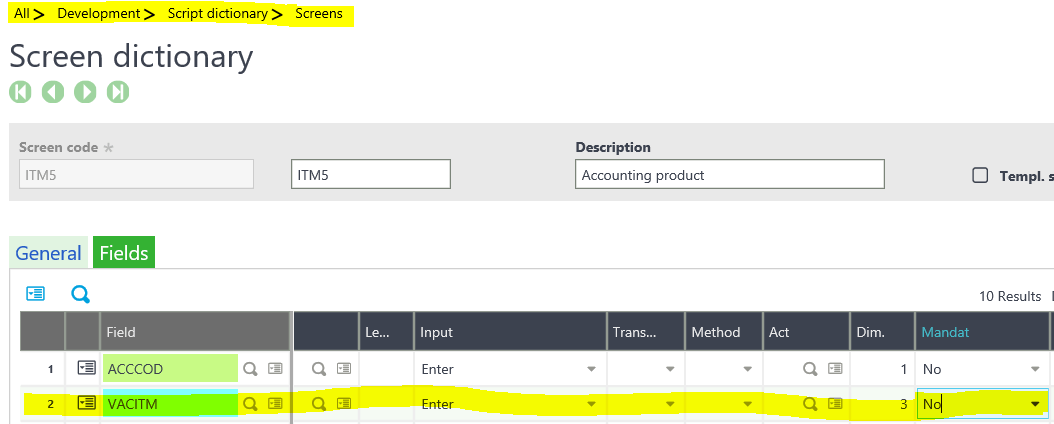
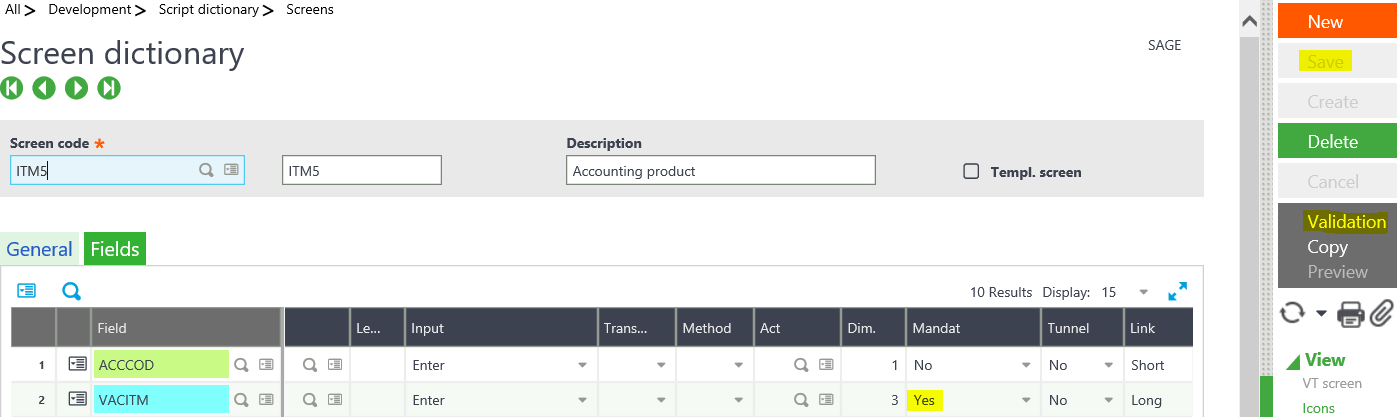
This is used to confirm a tax class must be applied when you create a new product. That creates a default tax class for when you add this item to a sales order. To do this, once again go to Development>Script Dictionary>Screens.
In conclusion, this may have been a very simple change, but it can be very useful depending on your requirements and needs. However, I recommend tracking system changes in order if you need to undo or redo something at a future time. In regards to keeping track of changes made in the system, that will be covered in the eleventh lesson.
It is a good practice to get in the habit of tracking changes made in your system.If you have more detailed questions on tracking changes in Sage X3 please contact us.
Stay Tuned for Lesson 11
This is the tenth post in Learning Sage X3. The next post (Lesson 11) will review, How to Track Changes Made in Sage X3 will post on November 28th, 2017. Other lessons in this series can be viewed at:
Lesson 1 of 14 - Important Acronyms and Definitions
Lesson 2 of 14 - General Navigation and User Interface
Lesson 3 of 14 - Sage X3 PU 11
Lesson 4 of 14 - Setting up Chart of Accounts
Lesson 5 of 14 - Sage CRM for X3
Lesson 6 of 14 - How to Add a Custom Report
Lesson 7 of 14 - How to Add a Column to a Left List in Sage X3
Lesson 8 of 14 - How to Export Data from Sage X3
Lesson 9 of 14 - How to Print a Report to Word and Excel
Need Help with Learning Sage X3?
Contact us if you have more in-depth question or want to Learn Sage X3 or to request help with your system.