
This is the eleventh lesson in the series Learning Sage X3. Since there are many moving parts in Sage X3, this lesson will cover how to track changes made to the system. This blog is to serve as a general overview. This allows you to protect yourself from overwriting changes in Sage X3.
Sage X3 Activity Codes
Used for a variety of reasons in Sage X3, I am going to outline how activity codes can protect your changes from being overwritten. All changes should be marked with an activity code because patching will not overwrite a component with an activity code not included in the patch.
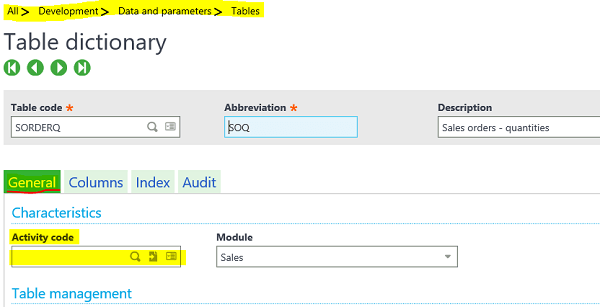
Once the folder is revalidated, the object dictionary (tables, screens, etc.) gets copied from the reference folder, overwriting existing objects. Only object or object elements (field, indexes, etc.) flagged with a specific activity code are protected. Header level is the General Tab.
Avoid putting a value in the Activity Code at the header of a base Sage X3 table. This prevents any table alterations with a patch from getting deployed which can lead to code errors.
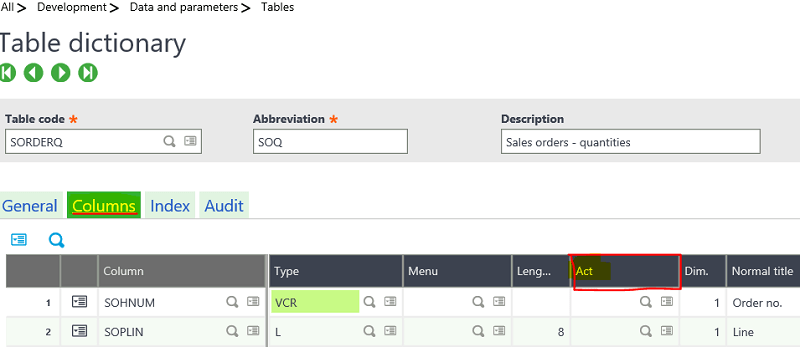
Putting the Activity Code at the field level will also protect the field level from patches.
You can put an Activity Code on Objects, Windows, Screens, as well as fields within these components.
Activity Codes should start with X, Y, or Z. These rules are loosely enforced but are for guidance and best practice recommendations:
- X – used for US created and vertical enhancements
- Y – used for what you create for a Customer as a Partner
- Z – used for a Customer to use for anything they can do themselves
Activity Code relation to database tables:
- Activity code field used in conjunction with the Module field to determine whether or not the table is created in the database folder.
- A table starting with X, Y, or Z is specific/custom and not affected by a version change. These Activity Codes are placed at line level.
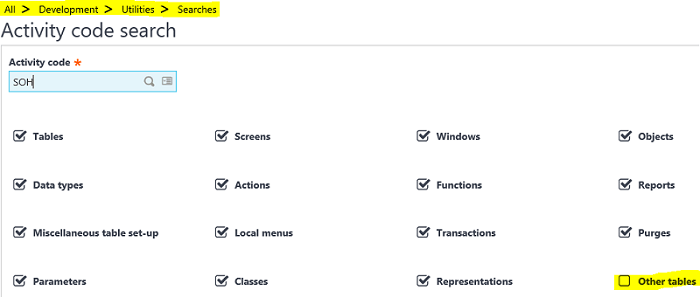
Sage X3 Activity Code Search
Patches: can be used to test a patch install or create a patch from a customized enhancement.
Patch Creation
Development > Utilities > Patches
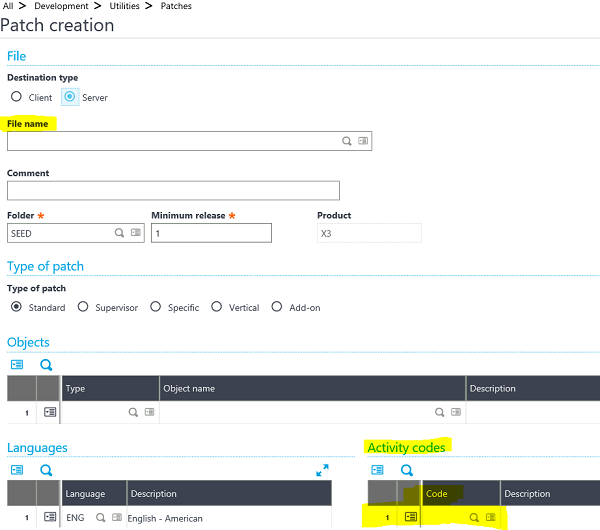
Test a Patch
Custom modifications are protected by an Activity Code and Patch test displays the Sage X3 element (screen, table, window, etc.), along with the activity code when a potential conflict exists.
Configuring an Activity Code
Development > Data and Parameters > Development Setup > Activity Codes

Once you create an Activity Code, you can use this for all of your changes. Please refer below for three examples of how to use this Activity Code within the system for tracking. For these examples, I have created the Activity Code ‘RES’ for tracking changes.
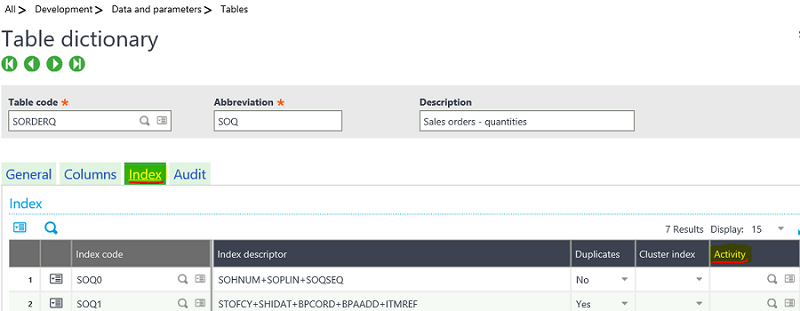
Create a Table – You can put an Activity Code at the Table, Fields, Index, or View Levels.
Header
Column (Field)
Index
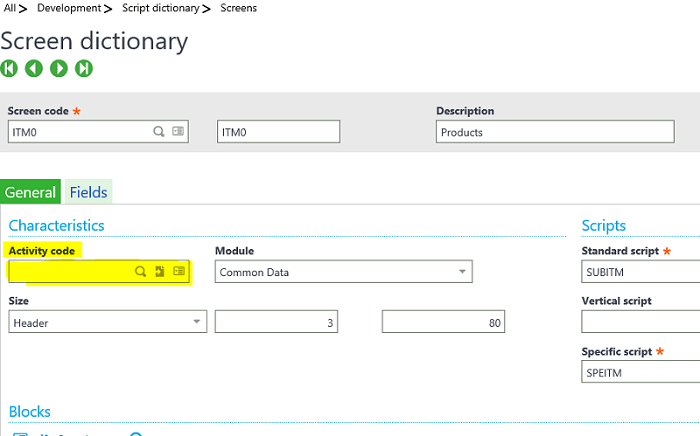
Create a Screen
If you create a new screen or just want to flag an existing screen as changed, you can attach an Activity Code like ‘RES’ at the Screen level. This also works for the Object and Window as well.
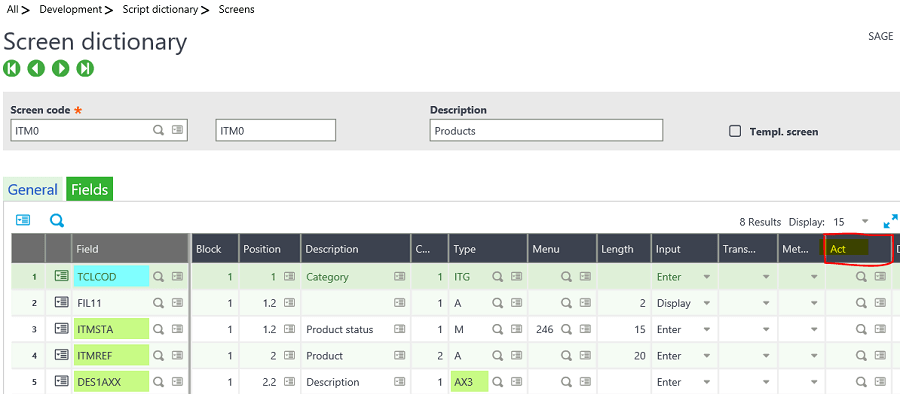
Modify a Field on a Screen
You can attach an Activity Code like ‘RES’ to any Field you add to a screen.
It is a good practice to get in the habit of tracking changes made in your system.If you have more detailed questions on tracking changes in Sage X3 please contact us.
Stay Tuned for Lesson 12
This is the eleventh post in Learning Sage X3. The next post (Lesson 12) this series will review How to Configure Auto-number in Sage X3 will post on December 5th, 2017. Other lessons in this series can be viewed at:
Lesson 1 of 14 - Important Acronyms and Definitions
Lesson 2 of 14 - General Navigation and User Interface
Lesson 3 of 14 - Sage X3 PU 11
Lesson 4 of 14 - Setting up Chart of Accounts
Lesson 5 of 14 - Sage CRM for X3
Lesson 6 of 14 - How to Add a Custom Report
Lesson 7 of 14 - How to Add a Column to a Left List in Sage X3
Lesson 8 of 14 - How to Export Data from Sage X3
Lesson 9 of 14 - How to Print a Report to Word and Excel
Lesson 10 of 14 - How to Configure a Field to be Mandatory
Need Help with Learning Sage X3?
Contact us if you have more in-depth question or want to Learn Sage X3 or to request help with your system.