
This is the eighth lesson in the series Learning Sage X3. As I was learning Sage X3, I came across a lot of users wanting to know how to get data out of Sage X3, so this lesson will cover how to export data from Sage X3. In this example, I picked the Products table because clients often want to do a cleanup of things related to the Product master or they want to export it to provide it to their customers or vendors.
- Go to Usage: Imports/Export templates
- Choose a template (For example, ITM)
- Uncheck Chrono Management box
- Choose whether to create the file on the server or the client. The selection determines where the data file path is located on the Sage ERP X3 Application server or on the client that is running the Export.
- Click OK
Choose the location of the export file you are creating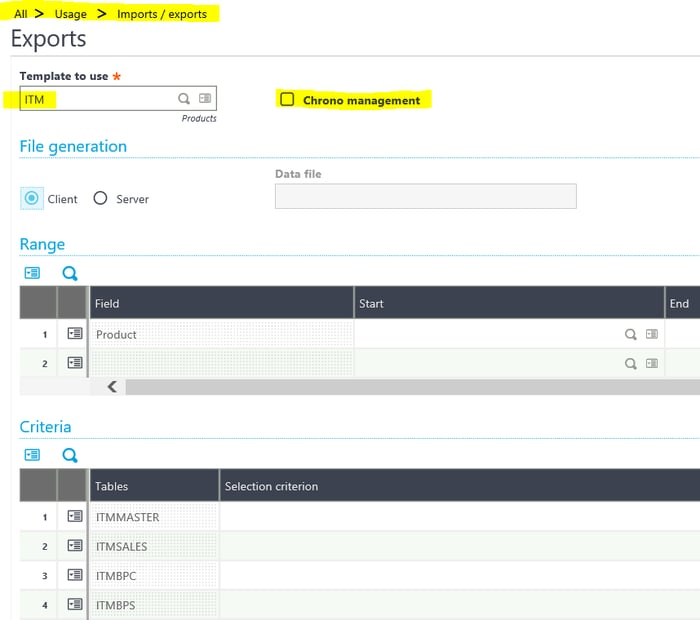
The above was simply running an existing Export Template. To create an Import/Export template, go to Set up > Usage > Import/Export template. I will cover some of the tasks and window fields at a high level. You can find all of this information in the Help system.
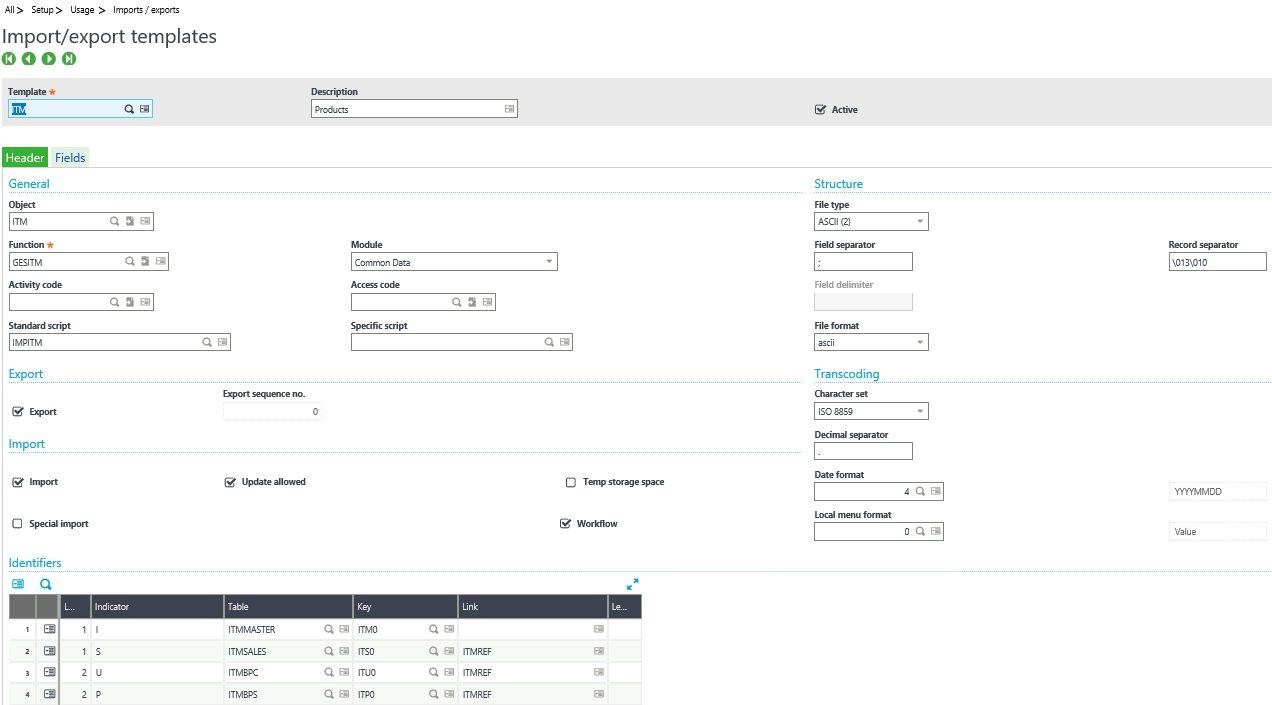
A good practice to remember is if you create anything new or modify an existing Sage X3 function to use the Activity Field code. This helps you identify changes as well as prevent them from being overwritten by a future patch.
This same procedure will work for any left list.
Stay Tuned for Lesson 9
This is the eighth post in Learning Sage X3. The next post (Lesson 9) will review, How to Print a Report in Sage X3 will post on November 14th, 2017. Other lessons in this series can be viewed at:
Lesson 1 of 14 - Important Acronyms and Definitions
Lesson 2 of 14 - General Navigation and User Interface
Lesson 3 of 14 - Sage X3 PU 11
Lesson 4 of 14 - Setting up Chart of Accounts
Lesson 5 of 14 - Sage CRM for X3
Lesson 6 of 14 - How to Add a Custom Report
Lesson 7 of 14 - How to Add a Column to a Left List in Sage X3
Need Help with Learning Sage X3?
Contact us if you have more in-depth question or want to Learn Sage X3 or to request help with your system.