
This is the ninth lesson in the series Learning Sage X3. Many clients request information on how to print Sage X3 reports into a word or excel format. In this post, the process of printing reports into both Microsoft word and excel will be covered.
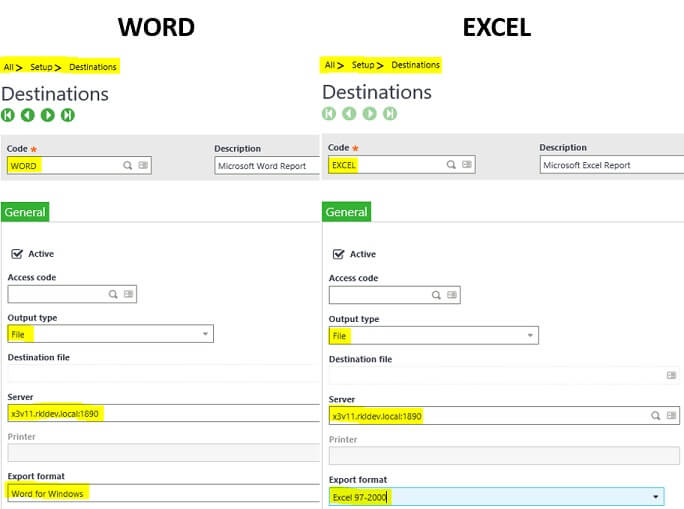
The first step is to navigate to Setup > Destinations > Destinations. Now create a new destination for both Word and Excel. On this function, create a code for each format, select the output type as file, select the server location print destination, and the export format for either word or excel.
After both the excel and word files destinations are created, log in to the selected application server chosen above.

Once in the application server, simply create two folders in the C drive (EXCEL and WORD). Please see above. After this, navigate to the desired report in Sage X3. For this example, I am going to print SPROALIV-‘Products to Deliver’ report. Please find the highlighted printer icon below for the next step.
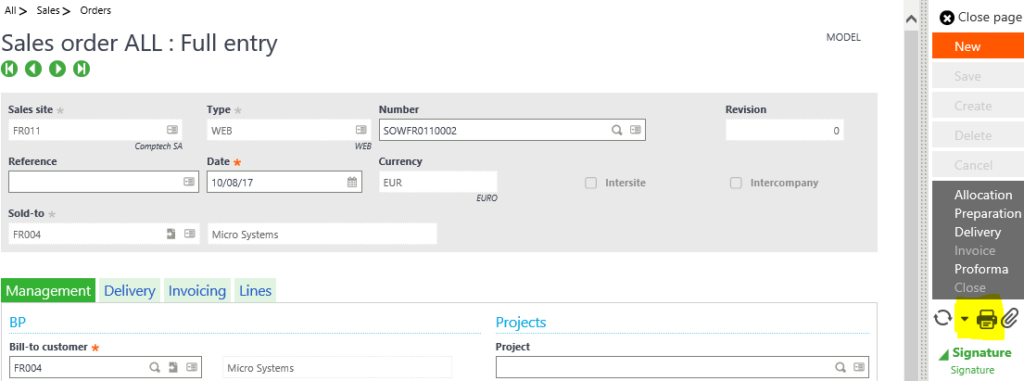
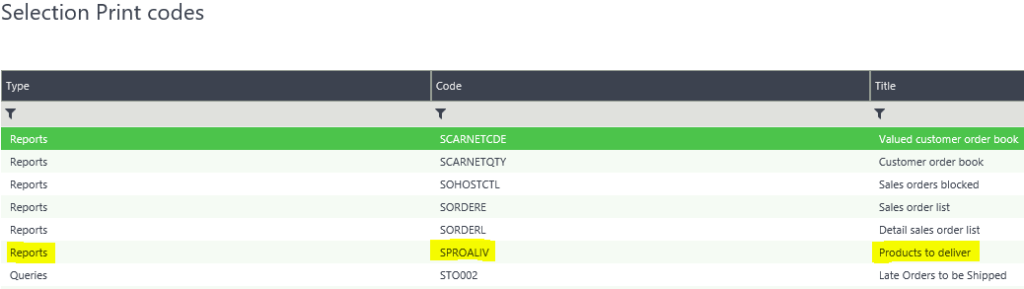
Select the printer icon on the right-hand side of the page. Once selected, select the ‘list’ option and not record. The list option generates selection print codes for the report. Select the desired report below. In this example, a Products to Deliver report will be printed as seen below.
After selecting the report code SPROALIV, the report parameters, destination, and more details are needed to be completed to finally print the report to Word or Excel.
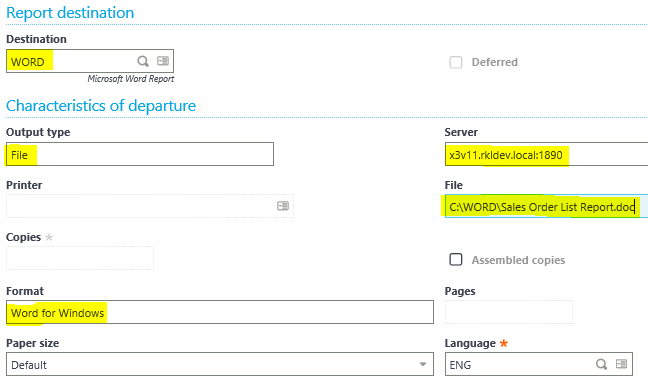
Enter the destination (WORD or EXCEL), the settings to follow will default from the setup from each. Next, enter the file location on the server where the files will be generated and saved in their appropriate formats.
Note: When entering the file for a Microsoft Word report, use .doc and not docx!
After the parameters are completed, print the report! However, instead of selecting the printer icon, select the word ‘Print’ on the upper right-hand side of the page.
Now navigate to the application server, locate the WORD or EXCEL folders and find the file you printed.
Put Screenshot of the folder navigation with the file saved.
Next, I am going to create the same report for EXCEL. The steps are nearly identical except the report destination details will be slightly different. Please reference the below screenshot.
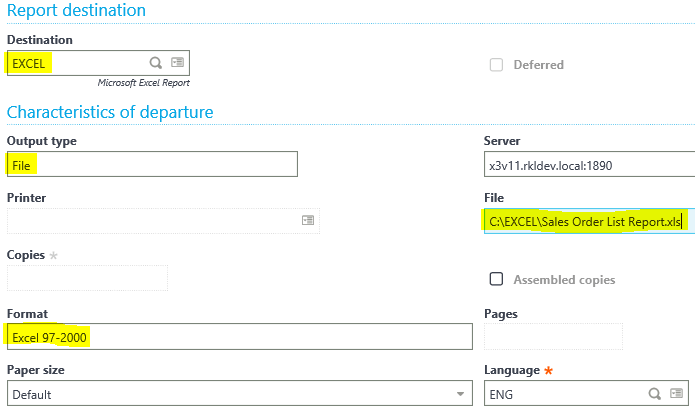
Note: When entering the file for a Microsoft Excel report, use .xls and not xlsx!
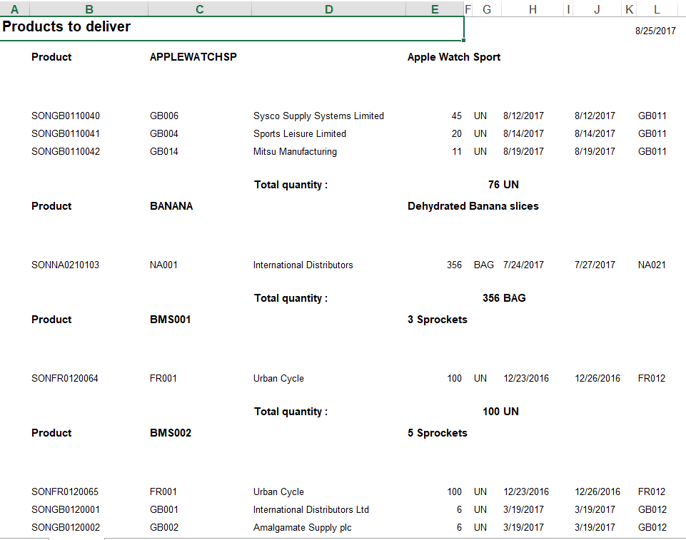
Navigate to the application server and locate both of the Word and Excel reports under the respective folders. Reference below to see how the reports should look.
Microsoft Word Report: Products to Deliver
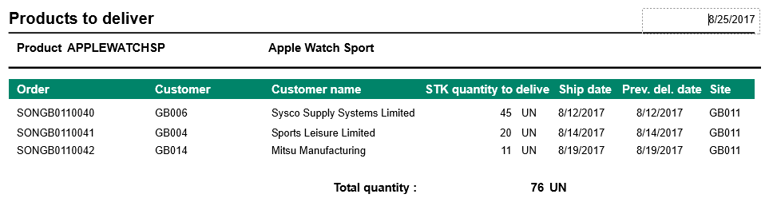
Microsoft Excel Report: Products to Deliver
Now you know how to print reports to a specific destination.
Stay Tuned for Lesson 10
This is the ninth post in Learning Sage X3. The next post (Lesson 10) will review, Configuring a Field to be Mandatory in Sage X3 will post on November 21st, 2017. Other lessons in this series can be viewed at:
Lesson 1 of 14 - Important Acronyms and Definitions
Lesson 2 of 14 - General Navigation and User Interface
Lesson 3 of 14 - Sage X3 PU 11
Lesson 4 of 14 - Setting up Chart of Accounts
Lesson 5 of 14 - Sage CRM for X3
Lesson 6 of 14 - How to Add a Custom Report
Lesson 7 of 14 - How to Add a Column to a Left List in Sage X3
Lesson 8 of 14 - How to Export Data from Sage X3
Need Help with Learning Sage X3?
Contact us if you have more in-depth question or want to Learn Sage X3 or to request help with your system.